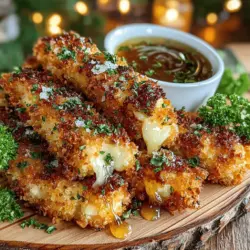
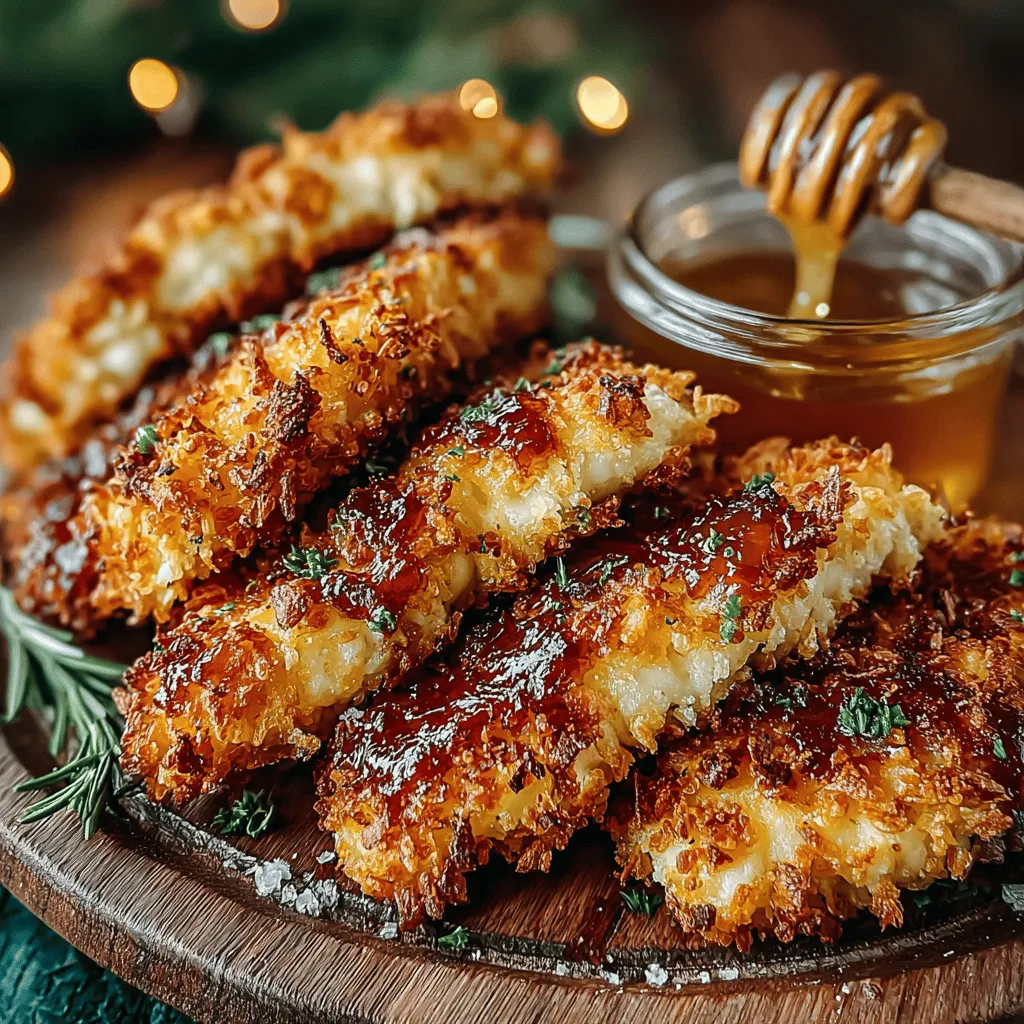
Crunchy Delight: Crispy Baked Chicken Tenders with Honey Mustard
When it comes to family-friendly meals, few dishes capture hearts quite like crispy chicken tenders. These delightful bites, often associated with fast-food menus, can be easily transformed into a healthier homemade version that retains all the crunch and flavor without the excess oil. Our recipe for Crunchy Delight: Crispy Baked Chicken Tenders with Honey Mustard is a perfect example of how to enjoy a classic favorite while keeping health in mind. With a crispy exterior and juicy interior, these baked tenders are not only satisfying but also easy to prepare, making them an excellent choice for busy weeknights or casual gatherings.
The appeal of these chicken tenders extends beyond their crunchiness; they are a versatile dish that can be paired with a variety of dipping sauces. However, the star of the show is undoubtedly the homemade honey mustard dip. This sweet and tangy sauce elevates the chicken tenders, adding an extra layer of flavor that is both refreshing and addictive. Whether served at a family dinner or at a gathering with friends, these chicken tenders are sure to impress.
Understanding the Ingredients
The success of any recipe lies in its ingredients, and this dish is no exception. Let’s take a closer look at the key components that contribute to the flavor, texture, and overall enjoyment of our crispy baked chicken tenders.
Chicken Tenderloins
At the heart of this recipe are chicken tenderloins, the small, tender cuts of meat located just beneath the chicken breast. Choosing tenderloins not only guarantees tenderness, but it also allows for quicker cooking times, making them ideal for weeknight dinners. Their naturally mild flavor acts as a perfect canvas for the seasoning and breading, ensuring that every bite is juicy and satisfying.
Buttermilk
One of the secrets to achieving moist and flavorful chicken tenders lies in the marinating process with buttermilk. This tangy dairy product not only infuses the chicken with flavor but also acts as a tenderizer. The acidity in buttermilk breaks down proteins in the meat, resulting in tender, juicy chicken. Marinating for at least 30 minutes (or even overnight) allows the flavors to penetrate deeply, ensuring that every bite is packed with taste.
Panko Breadcrumbs
When it comes to achieving that coveted crunch, panko breadcrumbs are the way to go. Originating from Japan, panko offers a coarser, flakier texture compared to traditional breadcrumbs. This unique structure allows for more air pockets, which leads to a lighter and crispier coating when baked. Using panko in our recipe not only enhances the texture of the chicken tenders but also contributes to a satisfying crunch that rivals fried versions.
Seasonings
Flavor is paramount in this recipe, and the blend of seasonings plays a crucial role. We use a combination of paprika, garlic powder, onion powder, salt, black pepper, and optional cayenne pepper to create a well-rounded flavor profile. Paprika adds a subtle smokiness and vibrant color, while garlic and onion powder contribute depth and savory notes. A sprinkle of cayenne pepper can introduce a gentle heat, perfect for those who enjoy a little kick. Together, these seasonings transform plain chicken into an irresistible dish.
Honey Mustard Dip
No chicken tender is complete without a delicious dipping sauce, and our homemade honey mustard dip is the perfect accompaniment. Made from a simple mix of honey, Dijon mustard, and a touch of mayonnaise, this dip balances sweetness and tanginess. The creamy texture complements the crispy chicken, ensuring that each bite is an explosion of flavor. Plus, making your own dip allows you to adjust the sweetness and tang to your liking, creating a custom sauce that everyone will love.
Preparation Steps for Crispy Baked Chicken Tenders
To ensure that your crispy baked chicken tenders turn out perfectly, follow these detailed preparation steps. Each step is designed to maximize flavor and texture, resulting in a dish that is both delicious and satisfying.
Marinating the Chicken
The first step in our preparation process is marinating the chicken tenderloins in buttermilk. This is a crucial step that helps to infuse the chicken with flavor and moisture. Place the tenderloins in a bowl or resealable plastic bag and cover them with buttermilk. For best results, allow the chicken to marinate for at least 30 minutes, though marinating for a few hours or overnight will yield even better results. The longer the chicken sits in the buttermilk, the more tender and flavorful it will become.
Preheating the Oven
While the chicken is marinating, it’s time to preheat your oven. Set the temperature to 425°F (220°C). A high baking temperature is essential for achieving that crispy exterior while keeping the chicken tender and juicy on the inside. This initial blast of heat allows the panko breadcrumbs to crisp up nicely, ensuring that your chicken tenders come out of the oven perfectly golden.
Creating a Breading Station
Before you begin breading the chicken, it’s important to set up an efficient breading station. This will streamline the process and make it easier to coat each piece evenly. You’ll need three shallow dishes: one for the buttermilk, one for the seasoned flour (made by mixing flour with your chosen seasonings), and one for the panko breadcrumbs. Organizing your ingredients in this manner will allow you to easily coat each tenderloin without making a mess.
Breading Technique
Now that your station is ready, it’s time to bread the chicken tenderloins. Start by removing a piece of chicken from the buttermilk, allowing any excess liquid to drip off.
1. Dredge in Flour: First, coat the chicken in the seasoned flour, ensuring it is fully covered. This layer helps the buttermilk adhere to the chicken and forms a base for the panko.
2. Back in the Buttermilk: Next, dip the floured chicken back into the buttermilk. This step is crucial as it helps the panko breadcrumbs stick better, ensuring a thick, crispy coating.
3. Coat with Panko: Finally, roll the chicken in the panko breadcrumbs, pressing gently to ensure the crumbs adhere well. Make sure each piece is fully coated for that extra crunch.
Once all the chicken tenders are breaded, place them on a baking sheet lined with parchment paper for easy cleanup and to prevent sticking.
Baking the Chicken Tenders
Now that your chicken tenders are breaded and ready, it’s time to bake them. Place the baking sheet in the preheated oven and bake for about 15-20 minutes, turning halfway through to ensure even browning. The high temperature will create a beautifully crisp exterior while the chicken cooks through, remaining juicy inside. Keep an eye on them in the last few minutes to ensure they don’t overcook.
With these detailed steps, you’re well on your way to creating delicious, crispy baked chicken tenders that will become a staple in your household. The combination of tender chicken, a crunchy coating, and a tangy honey mustard dip is sure to please everyone at the table. As you prepare this delightful dish, you’ll appreciate the ease and satisfaction of making a healthier version of a beloved classic.
Preparing the Baking Sheet
To achieve perfectly crispy baked chicken tenders, proper preparation of the baking sheet is essential. Start by lining your baking sheet with parchment paper, which not only helps prevent sticking but also enhances the overall crispiness of the chicken tenders. The parchment paper allows hot air to circulate around the tenders, promoting an even bake and preventing moisture buildup.
Next, lightly spray the parchment paper with olive oil spray. This step is crucial as it adds a thin layer of fat that contributes to a golden, crunchy exterior without the need for excessive oil. Remember, the goal is to keep the chicken tenders crispy while maintaining a healthier approach than traditional frying methods.
Baking Time and Temperature
When it comes to baking chicken tenders, the temperature and time are pivotal for achieving that perfect crunch. Preheat your oven to 425°F (220°C). This high temperature helps to cook the tenders quickly while sealing in moisture, resulting in juicy chicken with a beautifully crisp coating.
To determine doneness, use a meat thermometer to check the internal temperature of the chicken tenders. They should reach an internal temperature of 165°F (74°C) to be considered safe for consumption. This method not only ensures that your chicken is cooked thoroughly but also helps prevent overcooking, which can lead to dry chicken.
Baking Time: Typically, chicken tenders will take about 15-20 minutes to bake, depending on their thickness. To achieve the best results, flip the tenders halfway through the cooking time for an even bake on both sides.
Crafting the Honey Mustard Dip
No chicken tender experience is complete without a delightful dipping sauce, and the honey mustard dip is incredibly simple to make yet packed with flavor. The balance of sweetness from the honey and the tanginess from the mustard creates a perfect complement to the crispy chicken.
Mixing Ingredients
To craft this delectable dip, gather the following ingredients:
– ½ cup Dijon mustard
– ½ cup honey
– 1 tablespoon apple cider vinegar (optional for added tang)
– Salt and pepper to taste
In a medium mixing bowl, combine the Dijon mustard and honey. Adjust the ratio based on your personal taste preferences; for a milder flavor, add more honey, and for a spicier kick, increase the mustard. If you prefer a little acidity, stir in the apple cider vinegar. This simple addition brightens the flavor profile and enhances the overall taste.
Whisk the ingredients together until you achieve a smooth and creamy consistency. Taste it and season with salt and pepper as needed. The goal is a balanced dip that’s sweet, tangy, and slightly salty, elevating the chicken tender experience.
Serving Suggestions
Serve the honey mustard dip alongside the crispy baked chicken tenders for a delightful culinary experience. Consider presenting it in a small bowl placed at the center of a platter filled with tenders. This not only makes for a visually appealing display but also encourages sharing and interaction at the table.
Additionally, you could offer a variety of dips, such as barbecue sauce or ranch dressing, to cater to different taste preferences. This is particularly great for gatherings, allowing guests to mix and match their flavors.
Serving Suggestions and Pairings
Crispy baked chicken tenders with honey mustard dip make for a versatile dish suitable for various occasions. Here are some serving suggestions to inspire your next meal:
Family Dinners
For a wholesome family dinner, pair these chicken tenders with sides that complement their flavor and texture. Consider serving them alongside roasted vegetables like carrots, Brussels sprouts, or sweet potatoes. A fresh garden salad with a light vinaigrette can also enhance the meal, providing a refreshing contrast to the crispy tenders.
Game Day Snacks
Looking for the perfect game day snack? These chicken tenders can be transformed into a crowd-pleasing appetizer. Serve them with an assortment of dips, such as guacamole, buffalo sauce, or a creamy ranch dressing. Pair with crispy vegetable sticks or tortilla chips for added crunch and variety.
Kid-Friendly Options
One of the best aspects of this recipe is its kid-friendly nature. Children are often drawn to finger foods, and these chicken tenders are no exception. Their crispy texture and flavorful dip make them an instant hit. For a fun twist, consider serving them with a side of fruit skewers or sweet potato fries to keep the meal nutritious and enjoyable for the little ones.
Nutritional Information
One of the standout features of this recipe is its healthier approach compared to traditional fried chicken tenders. By baking instead of frying, you significantly reduce the fat content while still achieving that satisfying crunch.
Calories and Macros
Here’s an estimated breakdown of the nutritional content per serving (approximately 3 tenders with 2 tablespoons of honey mustard dip):
– Calories: 350
– Protein: 25g
– Carbohydrates: 30g
– Fat: 15g
These figures can vary based on portion size and specific ingredient brands, but this recipe remains a healthier option for a filling meal.
Health Benefits
Using lean chicken breast not only provides a good source of protein but also offers essential nutrients like B vitamins, iron, and zinc. Furthermore, making your own sauces allows you to control the ingredients. The honey mustard dip is free from preservatives and additives often found in store-bought versions, making it a healthier choice.
Opting for homemade sauces can also reduce sugar content, as you can adjust the sweetness of the honey to your liking, making it a better option for those monitoring their sugar intake.
Conclusion
Crispy baked chicken tenders with honey mustard dip are not only a delicious meal option but also a healthier alternative to traditional fried chicken. With their satisfying crunch and the perfect balance of sweet and tangy flavors from the honey mustard dip, they are sure to please everyone at the table.
Whether you’re preparing a family dinner, hosting a game day gathering, or looking for a kid-friendly meal, these chicken tenders offer versatility and taste. Try this recipe for your next family dinner or social gathering, and relish in the satisfaction of homemade cooking. Sharing a meal made with love is one of life’s great joys — and these chicken tenders are a fantastic way to do just that. Enjoy your culinary adventure and happy cooking!