Introduction
When it comes to celebrating birthdays, nothing quite compares to the joy of indulging in sweet treats that evoke fond memories of joyful gatherings and cherished moments. Birthday Bliss Cake Truffles are one such delightful dessert option that encapsulates the essence of a birthday celebration in every bite. These bite-sized delights not only promise a burst of flavor but also invite a sense of nostalgia, reminding us of the cakes that adorned our childhood festivities.
Cake truffles have gained popularity in recent years, becoming a trendy dessert choice that combines the rich taste of cake with the indulgence of chocolate. Their charming appearance, often coated in colorful sprinkles or drizzled with chocolate, makes them visually captivating and perfect for any celebration. Whether you’re planning a birthday party, a holiday gathering, or simply want to treat yourself and your loved ones, these truffles are the ideal solution.
What makes this recipe particularly appealing is its simplicity. With just a few key ingredients and straightforward steps, you can create these cake truffles right in your own kitchen. The vibrant colors and textures contribute to their festive appearance, making them an eye-catching centerpiece for any dessert table. So, let’s dive into the sweet world of Birthday Bliss Cake Truffles and discover how to create these delightful treats that are sure to bring smiles to faces of all ages.
The Joy of Cake Truffles
Cake truffles have taken the dessert world by storm, and for good reason. Their popularity stems from their versatility and the endless possibilities they offer. Unlike traditional cakes that require layers and intricate decorating techniques, cake truffles are a simpler alternative that still delivers on flavor and presentation. They allow bakers to be creative with their flavor combinations, from classic vanilla to rich chocolate or even fruity variations like strawberry or lemon.
One of the most appealing aspects of cake truffles is their adaptability. This dessert can be customized to suit various dietary needs and preferences. For those who are gluten-sensitive, gluten-free cake mixes can easily be used, ensuring everyone can enjoy these treats. Additionally, vegan options are accessible by substituting traditional ingredients with plant-based alternatives, such as vegan cream cheese and dairy-free chocolate. This inclusivity makes cake truffles a hit at gatherings where guests may have differing dietary restrictions.
The joy of making cake truffles goes beyond just flavor; they are also a fantastic way to bond with family and friends. Engaging in the process of baking and decorating can create lasting memories, making the experience of making Birthday Bliss Cake Truffles just as sweet as enjoying them.
Ingredients Breakdown
To craft your own Birthday Bliss Cake Truffles, you will need a handful of carefully selected ingredients. Each component plays a significant role in creating the perfect truffle, contributing to its flavor, texture, and overall aesthetic. Here’s a detailed look at each ingredient:
– Crumble Vanilla Cake: The foundation of your cake truffles lies in the crumbled vanilla cake. You have the option to use a store-bought cake for convenience or whip up a homemade cake for a more personalized touch. A classic vanilla cake serves as the ideal base, with its soft crumb and mild flavor that pairs well with other ingredients. If you opt for a homemade cake, ensure that it is completely cooled before crumbling, as this will help maintain the right consistency for mixing.
– Cream Cheese: Cream cheese is a crucial ingredient that adds richness and creaminess to your truffles. It serves as the binding agent, allowing the crumbled cake to come together smoothly. The tangy flavor of cream cheese complements the sweetness of the cake, creating a balanced taste that enhances the overall experience. For those seeking a lighter option, you can also consider using reduced-fat cream cheese or even vegan cream cheese alternatives.
– Powdered Sugar: Powdered sugar is used to sweeten the truffle mixture without adding any graininess. Its fine texture allows it to blend seamlessly with the other ingredients, ensuring a smooth and creamy consistency. Adjust the amount of powdered sugar based on your personal preference for sweetness. Remember that you can always start with less and add more as needed.
– Vanilla Extract: Quality vanilla extract is essential for enhancing the flavor profile of your truffles. It adds depth and richness, elevating the overall taste to new heights. When selecting vanilla extract, opt for pure vanilla rather than imitation, as the flavor difference is noticeable. A little goes a long way, so just a teaspoon will suffice.
– Rainbow Sprinkles: One of the most festive elements of Birthday Bliss Cake Truffles is the addition of rainbow sprinkles. These colorful bits not only add a fun and whimsical touch to the truffles but can also be incorporated into the truffle mix for added texture. Coating the truffles in sprinkles before serving gives them a celebratory flair, making them an ideal treat for birthdays and special occasions.
– White Chocolate Chips: White chocolate chips are the perfect choice for coating your cake truffles. Their creamy sweetness pairs beautifully with the cake mixture, providing a smooth and luscious outer layer. When melting white chocolate, be sure to use high-quality chips or bars to achieve the best melting properties and flavor.
– Coconut Oil: Incorporating coconut oil into the melted chocolate can enhance the texture and make it easier to work with. It helps to thin out the chocolate, creating a smooth coating that adheres nicely to the truffles. Additionally, coconut oil adds a subtle hint of flavor and richness that complements the other ingredients.
Step-by-Step Instructions for Making Birthday Bliss Cake Truffles
Now that you have a solid understanding of the ingredients, it’s time to roll up your sleeves and get started on making your Birthday Bliss Cake Truffles. The process is straightforward and can be divided into a few easy-to-follow steps.
Step 1: Prepare the Cake
If you’re opting for a homemade vanilla cake, begin by baking it according to your favorite recipe and allowing it to cool completely. Once cooled, crumble the cake into fine pieces in a large mixing bowl. If you’re using store-bought cake, simply remove it from its packaging and crumble it into the bowl.
Step 2: Mix the Truffle Base
Add the cream cheese, powdered sugar, and vanilla extract to the crumbled cake in the mixing bowl. Use a spatula or your hands to thoroughly combine the ingredients until you achieve a uniform mixture. The mixture should be moist enough to hold together when formed into balls. If it feels too dry, consider adding a touch more cream cheese.
Step 3: Form the Truffles
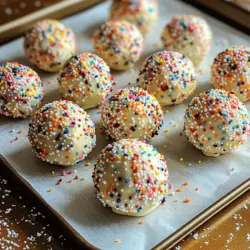
Using your hands, scoop out a small amount of the mixture and roll it into a ball, about one inch in diameter. Place the formed truffles on a baking sheet lined with parchment paper. Repeat this process until all the mixture has been rolled into truffles. Once done, pop the baking sheet into the refrigerator for about 30 minutes to allow the truffles to firm up.
Step 4: Melt the White Chocolate
While the truffles are chilling, melt the white chocolate chips in a microwave-safe bowl. Heat in short intervals, stirring in between, until the chocolate is completely smooth. If desired, add a teaspoon of coconut oil to the melted chocolate to enhance its consistency.
Step 5: Coat the Truffles
Once the truffles have set, remove them from the refrigerator. Dip each truffle into the melted white chocolate, using a fork to help coat them evenly. Allow any excess chocolate to drip off before placing the truffles back on the parchment-lined sheet. Sprinkle rainbow sprinkles on top of each truffle while the chocolate is still wet to ensure they adhere well.
Step 6: Chill Again
After coating all the truffles, return the baking sheet to the refrigerator for an additional 15-20 minutes to allow the chocolate coating to set completely.
With these steps, you are well on your way to creating the most delightful Birthday Bliss Cake Truffles. These treats not only deliver on flavor but also offer an opportunity to express your creativity through their vibrant appearance and customizable nature. Stay tuned for the next part of this article, where we will explore tips for achieving the best results and answer some common questions related to making these delightful cake truffles.
Mixing the Ingredients
To begin crafting your Birthday Bliss Cake Truffles, you will first need to mix the ingredients properly to create a delightful cake mixture. Start by crumbling your cooled cake into a large mixing bowl. You want the cake to be fine enough that it will easily combine with the other ingredients but not so fine that it becomes powdery. A fork or your hands can be used for this step.
Next, add the softened cream cheese to the crumbled cake. The cream cheese serves as a binding agent, adding moisture and a rich flavor that enhances the overall taste of the truffles. To this mixture, sift in the powdered sugar. This will help to eliminate any clumps, ensuring a smooth consistency for your truffles.
Now, add in the vanilla extract and a generous amount of sprinkles. The sprinkles not only add a festive touch but also a delightful crunch that complements the creaminess of the mixture. Using a spatula or your hands, mix everything together until fully combined. The goal is to achieve a homogenous mixture that holds together when pressed. If the mixture feels too dry, a splash of milk can be added to help it bind better.
Forming the Truffles
After mixing the ingredients, it’s time to shape your Birthday Bliss Cake Truffles. To ensure uniformity in size, use a cookie scoop or a tablespoon to measure out the mixture. This method will yield consistently sized truffles, ensuring even coating and presentation.
Once you’ve portioned out the mixture, roll each piece into a ball between your palms. Aim for a diameter of about one inch. This size is perfect for popping in your mouth for a sweet treat without being too overwhelming. Make sure to apply gentle pressure while rolling to avoid crumbling the mixture.
Place the rolled truffles on a parchment-lined baking sheet. This will prevent them from sticking and make for easy cleanup later. Once all the truffles are formed, it’s essential to chill them in the refrigerator for about 30 minutes. Chilling helps the truffles maintain their shape during the dipping process, preventing them from losing their form when coated in melted chocolate.
Melting the White Chocolate
While your truffles chill, it’s time to prepare the white chocolate for dipping. For the best results, use high-quality white chocolate chips or bars. Chop the chocolate into small, uniform pieces to ensure even melting.
To melt the chocolate, you can use either a microwave or a double boiler method. If using the microwave, place the chocolate in a microwave-safe bowl and heat it in 30-second intervals, stirring in between, until fully melted and smooth. Be cautious not to overheat the chocolate, as it can seize up and become grainy.
If you opt for the double boiler method, fill a saucepan with a couple of inches of water and bring it to a simmer. Place a heatproof bowl on top, ensuring it doesn’t touch the water. Add the chocolate to the bowl and stir until melted.
To enhance the smoothness and shine of your chocolate coating, incorporate a teaspoon of coconut oil. This addition helps to thin the chocolate slightly, making it easier to dip and giving your truffles a beautiful glossy finish.
Dipping and Decorating
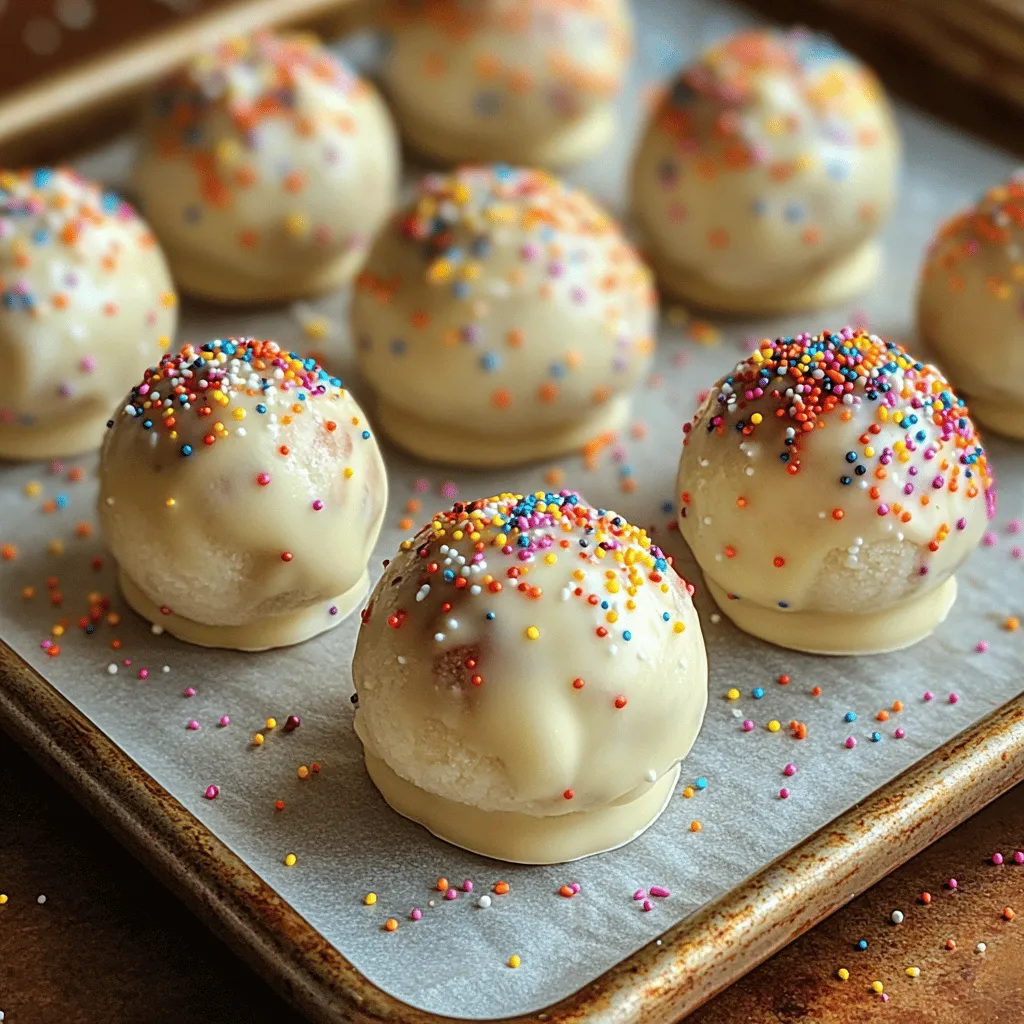
Once your white chocolate is melted and smooth, it’s time to dip the chilled truffles. Using a fork or a candy dipping tool, take a truffle and gently lower it into the melted chocolate. Swirl it around to coat it evenly, then lift it out, allowing any excess chocolate to drip off.
Place the dipped truffle back on the parchment-lined baking sheet. Before the chocolate sets, sprinkle additional colorful sprinkles on top to enhance the festive appearance. Timing is essential here; sprinkle while the chocolate is still wet so that it adheres properly.
Repeat the dipping process for all the truffles until they are fully coated. If you find that the chocolate starts to thicken as you work, simply reheat it gently until it becomes smooth again.
Final Chill
After all the truffles have been dipped and decorated, return them to the refrigerator for another 30 minutes. This final chill allows the chocolate coating to set completely, ensuring that your truffles are firm and ready to serve.
Once set, the Birthday Bliss Cake Truffles are ready to be plated and enjoyed.
Serving Suggestions
When it comes to presenting your Birthday Bliss Cake Truffles, creativity can elevate the experience. Consider arranging them on a decorative platter or tiered cake stand to create an eye-catching display at your next celebration.
For a delightful pairing, serve the truffles with a glass of cold milk, rich coffee, or even a sweet dessert wine. The creamy sweetness of the truffles complements these beverages beautifully, enhancing the overall taste experience.
These truffles are perfect not only for birthdays but also for other celebrations. They make fantastic treats at bridal showers, holiday parties, or even as festive gifts during the winter season. Their vibrant colors and delicious flavors make them an excellent addition to any dessert table, ensuring they are a hit with guests of all ages.
Storing and Enjoying Cake Truffles
To maintain the freshness of your Birthday Bliss Cake Truffles, proper storage is essential. Place the truffles in an airtight container, separating layers with parchment paper to prevent them from sticking together.
Stored in the refrigerator, the truffles will stay fresh for up to two weeks. If you want to enjoy them beyond this timeframe, consider freezing them. To freeze, arrange them in a single layer on a baking sheet and place them in the freezer until solid. Once frozen, transfer the truffles to a freezer-safe container. They can be stored for up to three months.
Thaw the frozen truffles in the refrigerator overnight before serving. This way, you can always have a batch of Birthday Bliss Cake Truffles on hand for unexpected guests or cravings. Additionally, consider incorporating them into dessert platters or gift baskets for a fun and personalized touch.
Conclusion
In summary, Birthday Bliss Cake Truffles are a delightful treat that combines the joy of cake with the indulgence of truffles. Their vibrant colors and rich flavors make them a feast for the eyes and the palate, perfect for any celebration. The straightforward preparation process allows even novice bakers to create these delicious bites of happiness.
Embrace the creativity of baking by experimenting with different sprinkle colors or incorporating various flavor extracts. The joy of sharing homemade desserts with loved ones is immeasurable, and these truffles are sure to bring smiles to everyone’s faces. So gather your ingredients, invite friends or family to join the fun, and indulge in the bliss of these delightful cake truffles.