Introduction
Desserts hold a special place in our hearts, serving as sweet endings to our meals and comforting treats during gatherings. The allure of dessert lies not only in its taste but also in the memories they evoke. Among the myriad of dessert options, few combinations are as cherished as peanut butter and chocolate. Today, we take this timeless duo to the next level with a delightful twist that will leave your taste buds dancing: the Creamy Peanut Butter Dream Pie.
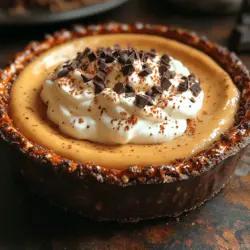
What sets this dessert apart is its unique blend of flavors and textures, featuring a crunchy pretzel crust that balances the rich, creamy peanut butter filling. The salty-sweet combination is a sensory delight, making it a favorite for those who appreciate a little contrast in their dessert experience. The Creamy Peanut Butter Dream Pie is more than just a dessert; it’s an experience that captures the essence of nostalgia while satisfying your cravings.
As the popularity of no-bake desserts continues to rise, this pie stands out not only for its ease of preparation but also for its versatility. Whether you’re celebrating a birthday, hosting a holiday gathering, or simply enjoying a casual afternoon snack, this pie is sure to impress. Let’s delve into the allure of this delightful dessert and explore how to create it in your own kitchen.
The Allure of Creamy Peanut Butter Dream Pie
Peanut butter has long been a beloved staple in many households, often associated with childhood memories of sandwiches and snacks. Desserts made with peanut butter evoke feelings of warmth and familiarity, making them a perfect choice for any occasion. The Creamy Peanut Butter Dream Pie encapsulates this nostalgia, offering a creamy filling that melts in your mouth and a crust that adds an unexpected crunch.
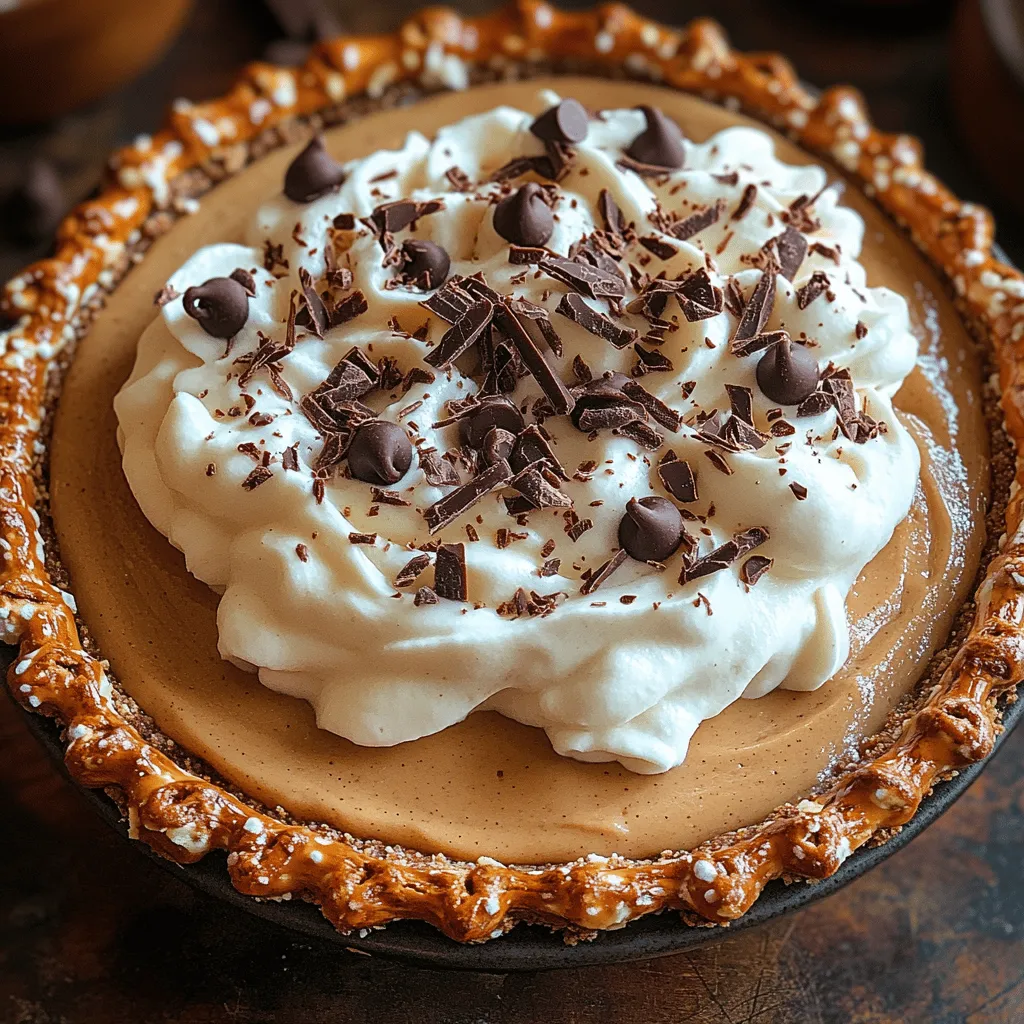
One of the key highlights of this pie is its pretzel crust, which enhances the overall flavor profile and adds a delightful texture. The combination of salty pretzels with the sweet, rich peanut butter filling creates a unique contrast that tantalizes the palate. This pie is not just about flavor; it’s an experience that brings together diverse textures and tastes, making every bite noteworthy.
Moreover, this pie’s versatility makes it an excellent dessert choice for various celebrations. Whether it’s a birthday party where you want to impress guests, a holiday gathering where everyone is looking for something special, or even a simple family dinner where you want to treat yourself, the Creamy Peanut Butter Dream Pie fits the bill perfectly. Its no-bake nature means that you can whip it up quickly, allowing you to focus on enjoying time with your loved ones rather than spending hours in the kitchen.
Ingredients Breakdown
Creating the Creamy Peanut Butter Dream Pie requires a handful of carefully chosen ingredients that contribute to its delectable taste and texture. Let’s break down these components to understand their roles in this delicious dessert.
Pretzel Crust
The foundation of this pie is its pretzel crust, which is unlike any traditional pie crust. The choice of pretzels—whether salted or unsalted—plays a crucial role in determining the flavor balance of the pie. Salted pretzels add a savory element that complements the sweetness of the peanut butter filling, while unsalted pretzels allow the sweetness to shine through more prominently.
For the crust, you will need crushed pretzels, melted butter, and sugar. The butter binds the pretzel crumbs together, while the sugar adds just the right amount of sweetness to balance the saltiness of the pretzels. This unique crust not only serves as a base for the pie but also contributes to its overall flavor and texture, making each bite a harmonious blend of sweet and salty.
Peanut Butter Filling
The star of the show is undoubtedly the peanut butter filling. For this recipe, using creamy peanut butter is essential; it ensures a smooth, velvety texture that is easy to spread and delightful to eat. The addition of cream cheese not only enhances the creaminess of the filling but also adds a subtle tang that balances the richness of the peanut butter.
The filling is typically sweetened with powdered sugar, which dissolves easily and prevents any graininess in the final product. A splash of vanilla extract is often included to round out the flavors and add a touch of warmth. The combination of these ingredients creates a filling that is rich, creamy, and utterly irresistible.
Topping
To elevate the presentation and taste of the Creamy Peanut Butter Dream Pie, a generous layer of whipped cream is added on top. This light and fluffy topping contrasts beautifully with the dense filling, providing a refreshing bite that enhances the overall dessert experience. For those looking to add an extra touch of indulgence, a sprinkle of chocolate shavings or a drizzle of chocolate sauce can take this pie to new heights. The chocolate not only adds visual appeal but also deepens the flavor profile, making it a perfect pairing with peanut butter.
Preparing the Pretzel Crust
Now that we understand the ingredients required for the Creamy Peanut Butter Dream Pie, let’s dive into the preparation, starting with the pretzel crust. This step is crucial, as a well-made crust sets the foundation for the entire pie.
Step-by-Step Instructions for the Pretzel Crust
1. Gather Your Ingredients: You will need about 2 cups of crushed pretzels, ½ cup of melted butter, and ¼ cup of granulated sugar. Make sure your pretzels are finely crushed to ensure even distribution throughout the crust.
2. Preheat the Oven: Preheat your oven to 350°F (175°C). Baking the crust helps to set its shape and enhances the flavor of the pretzels.
3. Combine Ingredients: In a mixing bowl, combine the crushed pretzels, melted butter, and sugar. Use a spatula or your hands to mix the ingredients until the pretzel crumbs are evenly coated with butter and sugar.
4. Pressing the Crust: Transfer the mixture into a 9-inch pie plate. Using the back of a measuring cup or your fingers, firmly press the pretzel mixture into the bottom and up the sides of the pie plate. This step is crucial—ensuring that the crust holds its shape during baking is key to a successful pie.
5. Bake the Crust: Place the pie plate in the preheated oven and bake for about 8-10 minutes, or until the crust is lightly golden and fragrant. Keep an eye on it to prevent burning.
6. Cooling: Once baked, remove the crust from the oven and let it cool completely before adding the peanut butter filling. Cooling is essential, as it allows the crust to firm up and makes it easier to slice the pie later.
Importance of Precise Measurements
When preparing the pretzel crust, precise measurements are vital. Too much butter can lead to a soggy crust, while too little can result in a crumbly mess. Aim for a consistency that holds together when pressed but remains firm once baked.
Techniques for Proper Pressing
Pressing the crust evenly into the pie plate is crucial for a successful pie. Ensure that the crust is compact and even, particularly around the edges where it tends to be more fragile. If you notice any cracks or gaps, simply use additional pretzel mixture to fill them in, pressing firmly to create a uniform crust.
By following these steps meticulously, you’ll set the stage for a delicious Creamy Peanut Butter Dream Pie that showcases the delightful interplay of flavors and textures.
Crafting the Perfect Peanut Butter Filling
With the pretzel crust ready, it’s time to craft the perfect peanut butter filling that will be the star of the show. This step is straightforward yet requires attention to detail to ensure a smooth and creamy texture.
Step-by-Step Instructions for the Peanut Butter Filling
1. Gather Your Ingredients: For the peanut butter filling, you’ll need 1 cup of creamy peanut butter, 8 ounces of cream cheese (softened), 1 cup of powdered sugar, and 1 teaspoon of vanilla extract.
2. Mix the Cream Cheese: In a large mixing bowl, beat the softened cream cheese with an electric mixer until smooth and creamy. This step is critical, as any lumps in the cream cheese will affect the final texture of the filling.
3. Add Peanut Butter: Once the cream cheese is smooth, add the creamy peanut butter to the bowl. Beat the mixture again until fully combined, ensuring there are no streaks of cream cheese or peanut butter left.
4. Incorporate Powdered Sugar: Gradually add the powdered sugar, mixing on low speed to prevent a sugar cloud. Once incorporated, increase the speed to medium and beat until the mixture is smooth and fluffy.
5. Flavor with Vanilla: Finally, add the vanilla extract and mix until everything is well combined. The vanilla adds depth to the filling, enhancing the overall flavor profile.
6. Filling the Crust: Once your filling is ready and the pretzel crust has cooled completely, pour the peanut butter filling into the crust. Use a spatula to spread it evenly, smoothing the top as desired.
At this point, the pie is almost complete. You can refrigerate it for at least four hours or until set, allowing the flavors to meld together beautifully. This no-bake dessert not only saves time but also ensures that the pie maintains a light, creamy texture that is perfect for any occasion.
As you prepare your Creamy Peanut Butter Dream Pie, remember that the key to success lies in the quality of ingredients and attention to detail during preparation. Enjoy the process and the anticipation of the delightful pie that awaits you!
Assembling the Creamy Peanut Butter Dream Pie
To achieve a stunning Creamy Peanut Butter Dream Pie, starting with the right techniques and tips is paramount. The most crucial factor is ensuring your ingredients are at room temperature. This allows for a smooth blending of flavors and a creamy texture that is essential for the perfect pie filling. Cold ingredients can lead to a lumpy mixture that won’t yield the desired silky consistency.
Whipping the Cream to Stiff Peaks
When it comes to incorporating whipped cream into your peanut butter mixture, the technique is as important as the ingredients themselves. Begin by chilling your mixing bowl and whisk (or beaters) in the freezer for about 10-15 minutes to ensure they are cold. This helps the cream whip more effectively.
1. Pour the heavy cream into the chilled bowl.
2. Using an electric mixer or a whisk, start beating the cream on medium speed.
3. Gradually increase to high speed. Watch for soft peaks to form—this is when the cream starts to hold its shape but still has a slight droop.
4. Continue whipping until you reach stiff peaks, where the cream holds its shape firmly and doesn’t collapse when you lift the whisk.
Once your cream is whipped, it’s time to fold it into the peanut butter mixture. This step requires a gentle touch to maintain the fluffy texture:
1. Add a dollop of the whipped cream to the peanut butter mixture and gently stir to lighten the base.
2. Then, add the remaining whipped cream in two or three additions.
3. Use a spatula to fold the whipped cream into the peanut butter mix. Scrape the sides and bottom of the bowl and bring the ingredients together without vigorous stirring, which could deflate the air incorporated in the whipped cream.
Pouring and Distributing the Filling
With your peanut butter mixture ready, it’s time to assemble the pie. Carefully pour the filling into the prepared pie crust. Use a spatula to help guide the mixture and ensure even distribution.
To achieve a smooth finish on the filling layer, dip the spatula in warm water before smoothing out the surface. This technique helps eliminate any lumps and creates a clean, polished top for your pie.
The Chilling Process
Once your pie is filled and smoothed out, it’s essential to chill it properly. Cover the pie with plastic wrap or a lid and refrigerate for at least four hours, although overnight is even better. Chilling is critical for allowing the pie to set, enabling the flavors to meld beautifully. A well-chilled pie will slice cleanly and hold its shape when served, enhancing your presentation.
Finishing Touches: Topping the Pie
Now that your pie has set, it’s time for the finishing touches.
1. Adding the Whipped Cream Topping:
– Take the remaining whipped cream you prepared earlier and add it on top of the chilled pie.
– You can use a piping bag fitted with a decorative tip for a more elegant presentation or simply spread it with a spatula for a rustic look.
– For added flair, consider creating peaks or swirls in the whipped cream topping.
2. Creative Toppings:
– Beyond the classic chocolate shavings, think about adding crushed peanuts for a delightful crunch, drizzled caramel sauce for a sweet kick, or even a sprinkle of flaky sea salt to enhance the flavors.
– You may also consider fresh fruit, such as sliced bananas or strawberries, which not only add color but also complement the rich peanut butter.
3. Importance of Presentation:
– A beautifully presented pie enhances the dessert’s appeal and invites guests to indulge. Consider using a pie server or a sharp knife to slice the pie to ensure clean edges, showcasing the layers of creamy filling and crust.
Serving Suggestions
The perfect time to serve your Creamy Peanut Butter Dream Pie is when it’s well-chilled. This pie pairs excellently with a glass of cold milk or a warm cup of coffee, creating a delightful contrast of temperatures and flavors. For gatherings, consider placing the pie on a dessert table alongside other treats like brownies or fruit tarts for a well-rounded sweet selection.
If you’re hosting a larger event, this pie can stand out among other desserts, making it a crowd-pleaser. You can even create mini versions of the pie using individual tart shells for a fun take on serving.
Nutritional Information
When it comes to the nutritional aspects of the Creamy Peanut Butter Dream Pie, it’s essential to consider the key ingredients. Peanut butter provides healthy fats and protein, while cream contributes richness and a decadent mouthfeel.
For those with dietary preferences, consider these modifications:
– Nut Butter Alternatives: If allergies or dietary restrictions prevent the use of peanut butter, almond butter or sunflower seed butter can serve as delicious substitutes.
– Gluten-Free Options: Use gluten-free pretzel crusts or alternative crust options like nut-based crusts to accommodate gluten sensitivities.
Conclusion
Creating a Creamy Peanut Butter Dream Pie is not just about following a recipe; it’s about crafting an experience that brings joy to gatherings and leaves a lasting impression on family and friends. The combination of creamy peanut butter filling, fluffy whipped cream topping, and a crunchy crust makes for an irresistible dessert that is bound to be a hit.
As you prepare this pie, don’t hesitate to explore your creativity with variations and personal touches. Whether it’s experimenting with different toppings or adjusting the sweetness, your version of this pie can be uniquely yours. So gather your ingredients, invite loved ones to join in the process, and enjoy the delightful experience of making and sharing this creamy, dreamy dessert.