Introduction
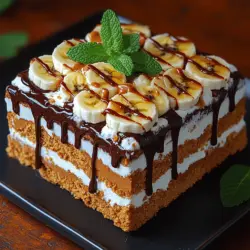
If you’re seeking a dessert that perfectly balances indulgence and simplicity, look no further than the Banana Bliss Icebox Cake. This delightful no-bake creation has become a beloved staple for summer gatherings and special occasions alike, offering a refreshing way to satisfy your sweet tooth without the hassle of baking. The combination of ripe bananas, creamy peanut butter, and fluffy whipped cream creates an irresistible treat that is not only delicious but also visually appealing.
No-bake desserts hold a special place in the hearts of many, particularly during warm weather months when the thought of turning on the oven can seem unbearable. The Banana Bliss Icebox Cake exemplifies the best of this category, presenting a cool and creamy dessert that is as satisfying to eat as it is easy to prepare. With layers of graham crackers soaked in creamy goodness, this cake is an indulgent treat that can be prepped in advance, allowing you to enjoy your time with family and friends.
In this article, we’ll provide a detailed recipe and guide for making the Banana Bliss Icebox Cake. From understanding the origins of icebox cakes to crafting each layer of this delicious dessert, you’ll learn everything you need to create this show-stopping dish that is sure to impress.
Understanding Icebox Cakes
Definition and Origin of Icebox Cakes
Icebox cakes are a classic dessert that date back to the early 20th century, emerging during a time when home refrigeration became commonplace. The term “icebox” refers to the early versions of modern refrigerators, which were commonly used in homes to keep perishable food cool. As a result, icebox cakes were created as no-bake alternatives to traditional baked cakes, allowing cooks to prepare delightful desserts without the need for an oven.
The fundamental concept of an icebox cake is simple: layers of cookies or crackers are alternated with a creamy filling—usually made from whipped cream and various flavorings—then chilled until the layers meld together into a cohesive cake. This results in a dessert that is both light and indulgent, with a unique texture that is soft and creamy yet slightly firm from the chilled layers.
Popularity of Icebox Cakes in Modern Dessert Culture
In recent years, icebox cakes have experienced a resurgence in popularity, partly due to their ease of preparation and the endless flavor combinations that can be explored. Food bloggers and home chefs alike have embraced these desserts for their versatility, often adapting traditional recipes to cater to various dietary preferences. From classic chocolate cream to more adventurous flavors like matcha or pumpkin spice, there’s an icebox cake for everyone.
The Banana Bliss Icebox Cake stands out in this dessert landscape due to its nostalgic flavors and the wholesome ingredients that make it a perfect summer treat. As more people seek out no-bake options for entertaining or casual family gatherings, the appeal of icebox cakes continues to grow, making them a sought-after addition to any dessert table.
The Role of Graham Crackers and Whipped Cream
At the heart of any icebox cake are the essential components of graham crackers and whipped cream. Graham crackers provide a sturdy yet tender base for the layers, contributing a subtle sweetness and crumbly texture that contrasts beautifully with the creamy filling. The use of whipped cream is equally important; it adds lightness and volume, creating a luscious filling that envelops the layers of cake in a soft embrace.
Together, these ingredients work in harmony to create a dessert that is not only easy to assemble but also delightful to eat. The way the flavors meld and transform during the chilling process is part of what makes icebox cakes so extraordinary. Each bite delivers a burst of creamy banana and peanut butter flavor, complemented by the gentle crunch of graham crackers.
Key Ingredients for Banana Bliss Icebox Cake
Creating the perfect Banana Bliss Icebox Cake hinges on the quality and selection of ingredients. Here’s a breakdown of the key components you’ll need to gather before diving into the dessert-making process:
Ripe Bananas
The star of the show in this icebox cake is, of course, the bananas. When selecting bananas, opt for ripe ones that are speckled with brown spots. These bananas are sweeter and have a softer texture, making them ideal for layering in the cake. Overripe bananas can also be used; they’re perfect for adding natural sweetness and a creamy consistency to the dessert.
Heavy Whipping Cream
The quality of your whipped cream is crucial for achieving the light and airy texture that defines the Banana Bliss Icebox Cake. Look for heavy whipping cream with a fat content of at least 36%. This higher fat content is essential for achieving stable, stiff peaks when whipping, ensuring that your cream holds its shape as the cake chills.
Powdered Sugar
When it comes to sweetening whipped cream, powdered sugar is preferred over granulated sugar. This is because powdered sugar dissolves more easily and creates a smoother, creamier texture. Additionally, many brands of powdered sugar contain cornstarch, which helps stabilize the whipped cream and prevent it from deflating.
Vanilla Extract
To enhance the flavor profile of the dessert, a splash of high-quality vanilla extract is essential. Vanilla adds depth and warmth to the whipped cream and complements the sweetness of the bananas and peanut butter beautifully. Choose pure vanilla extract for the best flavor, as artificial vanilla can sometimes have a synthetic taste.
Graham Crackers
Graham crackers serve as the foundation of the Banana Bliss Icebox Cake, providing structure and a delightful crunch. They are versatile and can be used in various dessert recipes, but for this cake, they soak up the flavors of the filling while still maintaining a slight bite. You can also experiment with flavored graham crackers, like cinnamon or chocolate, to add an extra dimension to your cake.
Creamy Peanut Butter
Peanut butter adds a savory element that balances the sweetness of the bananas and whipped cream. A smooth and creamy peanut butter is ideal, as it will blend seamlessly into the whipped cream, creating a cohesive filling. If you prefer, you can use crunchy peanut butter for added texture or opt for a natural nut butter without added sugars or oils for a healthier twist.
Optional Ingredients
To elevate the Banana Bliss Icebox Cake further, consider incorporating optional ingredients such as chopped walnuts for added crunch or a drizzle of chocolate syrup for presentation. Chopped walnuts not only add texture but also enhance the nutty flavor profile of the cake, while a chocolate drizzle can create an elegant finish that pleases the eye.
Step-by-Step Instructions for Crafting the Cake
Now that you have a solid understanding of the ingredients involved in making the Banana Bliss Icebox Cake, it’s time to dive into the preparation process. Below are the step-by-step instructions to help you craft this delectable dessert.
Preparing the Whipped Cream
1. Chill Your Equipment: Before you begin, place your mixing bowl and beaters in the freezer for about 10-15 minutes. Chilling your equipment will help the cream whip faster and achieve stiff peaks more easily.
2. Measure the Cream: Pour 2 cups of heavy whipping cream into the chilled mixing bowl. This amount will provide enough whipped cream for layering and topping your cake.
3. Add Sweeteners and Flavor: Sprinkle in 1/2 cup of powdered sugar and add 1 teaspoon of pure vanilla extract to the cream. The powdered sugar will sweeten the whipped cream while enhancing its texture, and the vanilla will impart a warm, inviting flavor.
4. Whip the Cream: Using an electric mixer, begin whipping the cream on medium speed. As the cream thickens, gradually increase the speed to high. Continue whipping until the cream reaches stiff peaks, which means it should hold its shape when the beaters are lifted. Be careful not to overwhip, as this can lead to butter forming.
5. Incorporate Peanut Butter: Once you have reached stiff peaks, gently fold in 1/2 cup of creamy peanut butter using a spatula. Be gentle during this process; you want to maintain the airiness of the whipped cream while ensuring that the peanut butter is evenly distributed throughout.
6. Taste and Adjust: Before assembling the cake, taste the whipped cream mixture. If you prefer a sweeter or more pronounced peanut butter flavor, feel free to adjust the powdered sugar or peanut butter to your liking.
This preparation of whipped cream serves as the lush filling for your Banana Bliss Icebox Cake. The combination of the light, airy cream with the rich, creamy peanut butter creates a luxurious texture that will envelop each layer of banana and graham cracker.
From here, you will continue layering the ingredients in the next steps of your icebox cake creation, ensuring each component is perfectly placed to achieve the ultimate dessert experience. Stay tuned for the next part of the article, where we will explore the assembly of this delightful no-bake cake!
Layering the Graham Crackers: Tips for Even Layering and Maximizing Flavor
To create a stunning Banana Bliss Icebox Cake, the first step is to layer the graham crackers evenly. This foundational layer is crucial for both structural integrity and flavor enhancement. Start by selecting high-quality graham crackers, as their natural sweetness and texture will elevate your dessert.
When layering, ensure that the crackers are placed flat and aligned for a uniform appearance. A good practice is to slightly overlap the edges of the crackers, which not only provides stability but also helps to prevent gaps that could cause the filling to seep through. For added flavor, consider lightly brushing the graham crackers with a mixture of milk and a dash of vanilla extract before layering. This will enhance the overall taste and create a more delightful contrast with the creamy filling.
Spreading Peanut Butter: Best Practices for an Even Spread Without Tearing the Crackers
Peanut butter is a star ingredient that adds a rich and nutty flavor to the Banana Bliss Icebox Cake. To achieve an even spread without tearing the delicate graham crackers, follow these simple steps. First, ensure your peanut butter is at room temperature; this will make it easier to spread.
Using a butter knife or an offset spatula, scoop out a generous amount of peanut butter and place it in the center of the graham cracker layer. Start spreading gently from the center outward, applying light pressure to avoid cracking the crackers. If you prefer a creamier texture, you might also consider mixing the peanut butter with a little bit of cream cheese or whipped cream to help it spread more easily and create a smoother layer.
Arranging Bananas: Creative Ways to Layer Bananas for Visual Appeal
The arrangement of bananas is not only key to the flavor but also crucial for the visual appeal of your Banana Bliss Icebox Cake. Begin by slicing ripe bananas into even rounds; uniformity is essential for both aesthetics and texture. For an eye-catching presentation, consider creating a fan pattern or a circular arrangement on top of the peanut butter layer.
You can also alternate the banana slices with a sprinkle of cinnamon or a drizzle of honey to enhance their natural sweetness while adding depth to the flavor. Another creative approach involves using banana shapes—cutting some slices into smaller pieces or even using a decorative cutter to create fun shapes that will appeal to children and adults alike.
Assembling the Whipped Cream Layers: Ensuring Even Distribution for a Balanced Dessert
The whipped cream layer is where the magic of the Banana Bliss Icebox Cake truly comes to life. To assemble this layer, make sure your heavy cream is cold for the best whip. Using a stand mixer or a hand mixer, whip the cream until it reaches soft peaks, then gradually add sugar and vanilla extract for flavor.
Once your whipped cream is ready, gently dollop a generous portion over the bananas. To ensure even distribution, use a spatula to spread the whipped cream smoothly across the surface, being careful not to disturb the banana layer beneath. Repeat this process for additional layers, alternating between peanut butter, bananas, and whipped cream, until you reach the desired height. The final layer should always be whipped cream, as this creates a beautiful finish for your cake.
Chilling the Cake: Importance of Refrigeration for Flavor Melding and Texture Transformation
After assembling the layers, it’s time to chill your Banana Bliss Icebox Cake. Refrigeration is vital for allowing the flavors to meld together, resulting in a harmonious taste profile that enhances every bite. The chilling process also transforms the texture, as the graham crackers absorb moisture from the cream and bananas, softening to create a delicate balance between crunch and creaminess.
Cover the cake with plastic wrap or a cake dome to prevent it from absorbing any odors from the fridge. Allow the cake to chill for at least four hours, but overnight is ideal for the best flavor and texture. This waiting period not only improves the overall taste but also makes it easier to slice when you’re ready to serve.
Flavor Profile and Texture of the Cake
The Banana Bliss Icebox Cake is a delightful combination of flavors that will have your taste buds dancing. The sweetness of ripe bananas complements the nutty richness of peanut butter, while the fluffy whipped cream adds a light, airy quality. This interplay of flavors creates a dessert that is indulgent yet refreshing, making it perfect for any occasion.
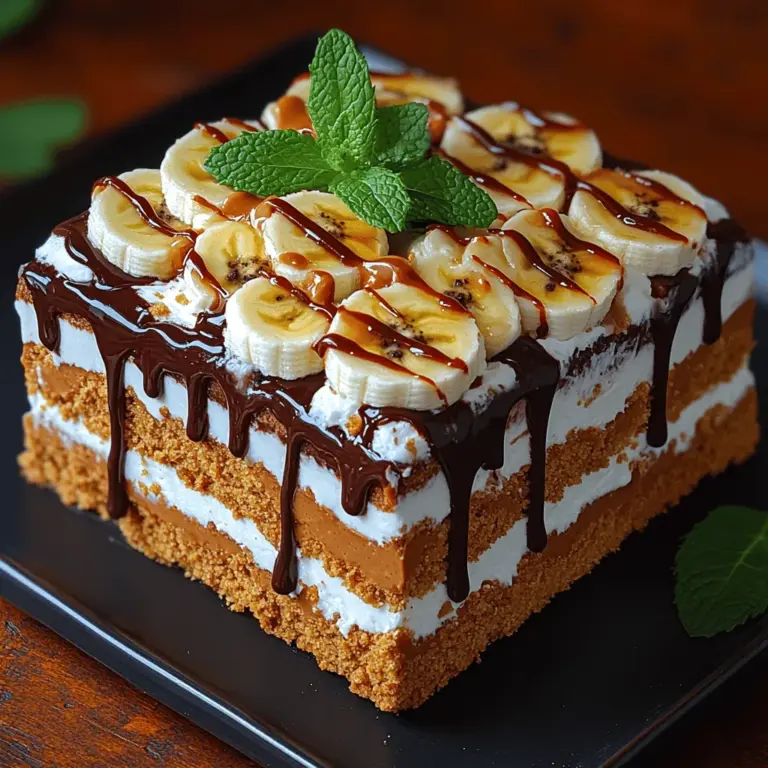
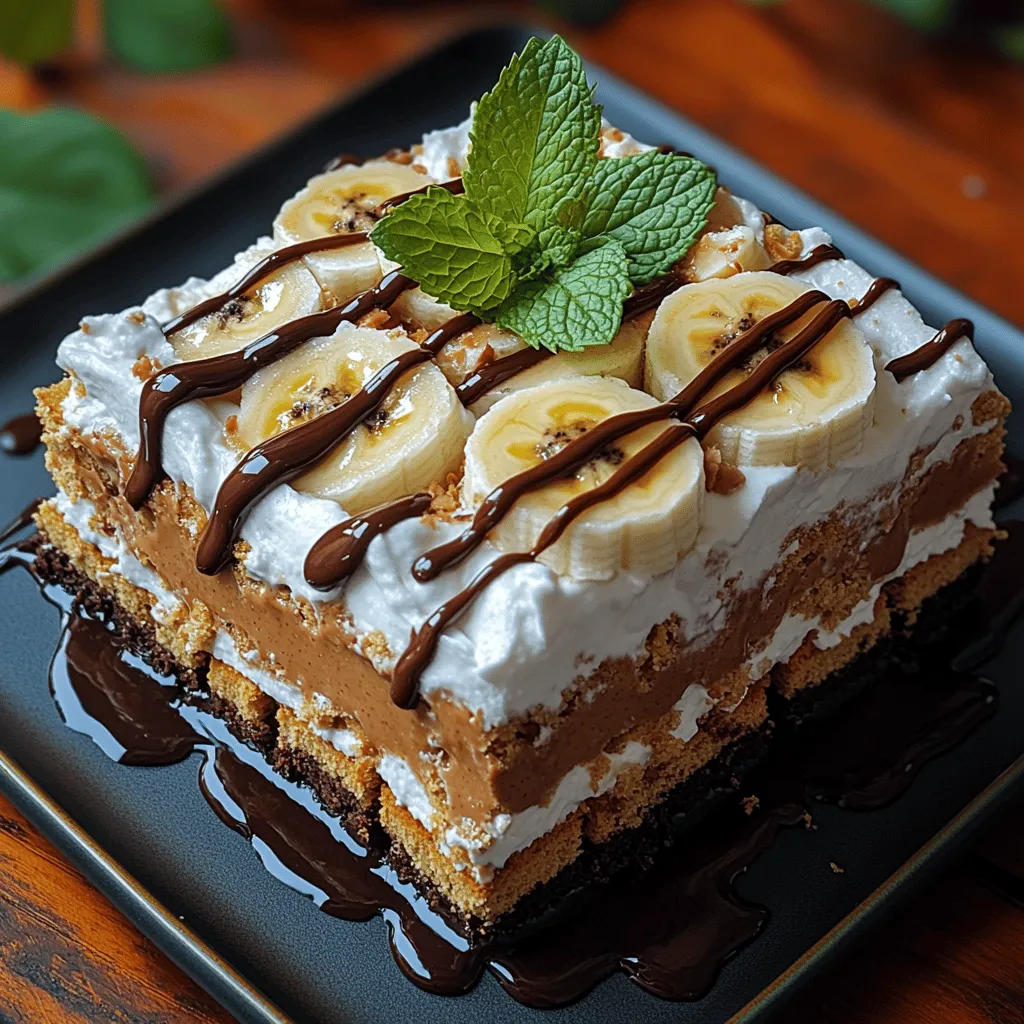
Texture-wise, the contrast is equally impressive. The smooth and creamy whipped cream layer provides a lovely softness that contrasts beautifully with the crunchy graham crackers. Each bite brings a satisfying crunch followed by the creamy bliss of whipped cream and the rich flavor of bananas and peanut butter. Visually, the cake is a feast for the eyes, showcasing layers of beige, yellow, and white, with the bananas adding a pop of color that makes it irresistible.
Serving Suggestions and Presentation Ideas
When it comes to serving your Banana Bliss Icebox Cake, presentation is key. For a clean cut, use a sharp knife dipped in warm water, wiping it between slices for a neat finish. Consider serving individual slices on dessert plates garnished with a drizzle of chocolate syrup or a sprinkle of crushed nuts for added texture.
For a touch of elegance, top each slice with a fresh mint leaf or a few slices of banana. This not only adds color but also enhances the flavor experience. Pair the cake with a glass of cold milk or a scoop of vanilla ice cream for an indulgent treat. For gatherings, consider serving it alongside a fruit salad or an assortment of cookies to create a delightful dessert spread.
Nutritional Information
Understanding the nutritional content of your Banana Bliss Icebox Cake can help you enjoy it guilt-free. Each slice typically contains around 250-300 calories, depending on the portion size and specific ingredients used. The cake offers a balance of indulgence with the nutritional benefits of bananas, which are rich in potassium and vitamins.
The presence of peanut butter adds healthy fats and protein, making this dessert not only a treat but also a satisfying option that can keep you fuller for longer. While it is a dessert, the combination of ingredients can provide a sense of balance, allowing you to enjoy a sweet indulgence without completely compromising on nutrition.
Conclusion
The Banana Bliss Icebox Cake is a delightful and easy-to-make dessert that promises to impress at any gathering, picnic, or family dinner. With its layers of flavor and texture, this cake is not only visually stunning but also a delicious option that everyone will love.
Encouragingly simple to assemble and requiring minimal time in the kitchen, this recipe allows you to whip up a crowd-pleaser in no time. Whether you are hosting a summer BBQ or looking for a sweet treat after dinner, the Banana Bliss Icebox Cake is an excellent choice. Try making this recipe today and experience the joy it brings to your gatherings, as well as the smiles on the faces of your friends and family.