
Introduction
Cooking for kids can often be a delightful yet challenging experience. As parents and caregivers strive to offer meals that are not only nutritious but also appealing to young palates, finding the perfect recipe becomes essential. Enter the Turkey & Cheese Melts: a simple, delicious, and kid-friendly delight that combines wholesome ingredients and flavors to create a meal that both children and adults will love. This article will guide you through the process of making these scrumptious melts, covering everything from the benefits of the ingredients to the step-by-step cooking instructions.
The Turkey & Cheese Melts are not just a treat; they are a wonderful way to sneak in some healthy ingredients while ensuring that your little ones enjoy their meal. With a perfect balance of protein, dairy, and whole grains, this recipe offers a wholesome option that can be prepared in no time. Get ready to make mealtime fun and engaging with this easy-to-follow recipe!
Recipe Overview
– Total Time: 30 minutes
– Servings: 4
– Difficulty: Easy
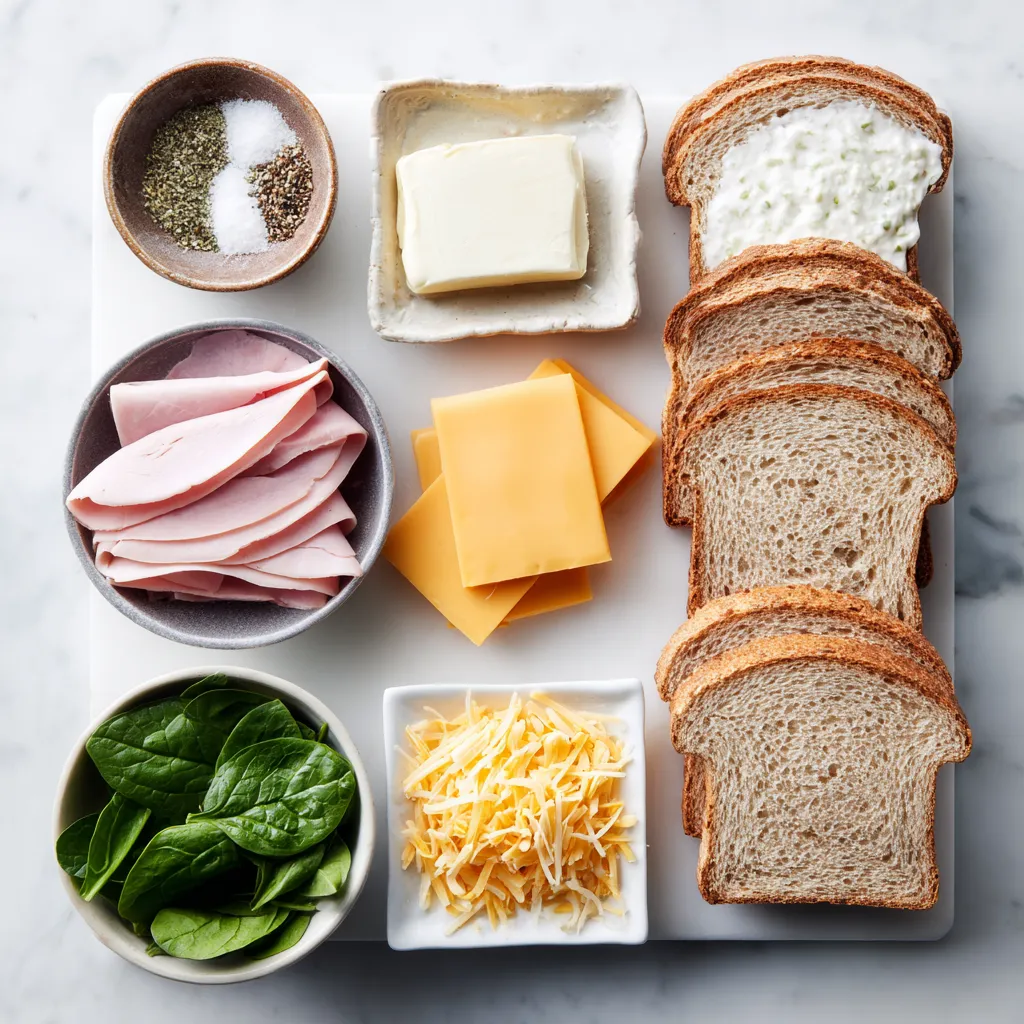
Ingredients
– 8 slices of whole grain bread
– 8 ounces of sliced turkey breast
– 4 slices of cheese (cheddar or mozzarella)
– 2 tablespoons of butter, softened
– 1 cup of fresh spinach leaves
– Salt and pepper to taste
Instructions
1. Preheat your oven to 375°F (190°C).
2. Spread the softened butter on one side of each slice of bread.
3. Lay four slices of bread, buttered side down, on a baking sheet.
4. Layer the sliced turkey on top of each bread slice.
5. Add a slice of cheese over the turkey.
6. Place a handful of fresh spinach on top of the cheese.
7. Season with salt and pepper to taste.
8. Top with the remaining slices of bread, buttered side up.
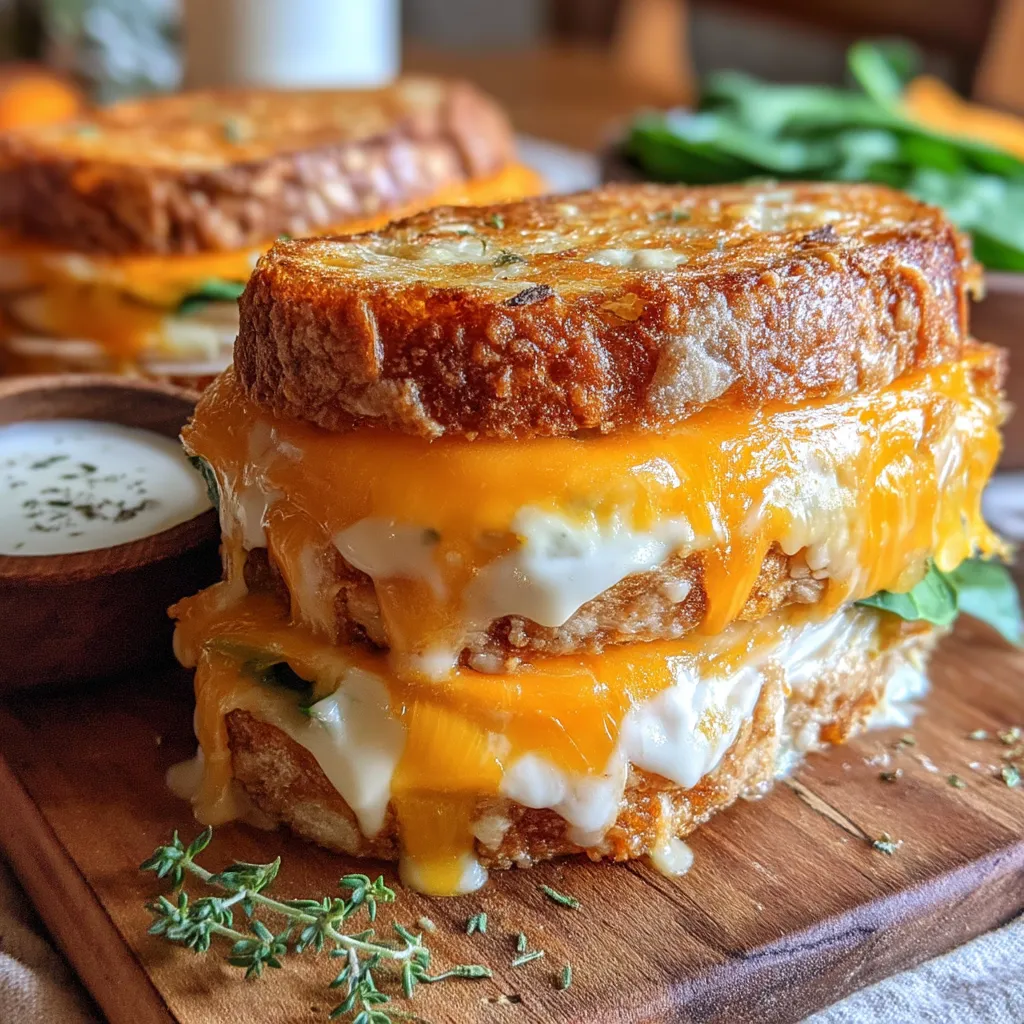
9. Bake in the preheated oven for 10-12 minutes, or until the bread is golden brown and the cheese is melted.
10. Remove from the oven, slice, and serve warm.
Understanding the Appeal of Turkey & Cheese Melts
The Nutritional Benefits of Turkey and Cheese
Exploring Whole Grain Bread as a Healthier Choice
The Importance of Adding Vegetables: Spinach and Beyond
Gathering Your Ingredients
Essential Ingredients for Turkey & Cheese Melts
Optional Ingredients for Enhanced Flavor and Nutrition
Preparing the Turkey & Cheese Melts
Creating the Flavorful Butter Spread
Step-by-Step Instructions for Assembling the Melts
Tips for Achieving the Perfect Golden-Brown Crust
Cooking Techniques for Success
Choosing the Right Cookware: Skillet vs. Griddle
When it comes to cooking Turkey & Cheese Melts, the choice of cookware can significantly impact the outcome. A skillet is ideal for those who prefer a more controlled cooking environment, allowing for even heat distribution. On the other hand, a griddle provides ample space for multiple sandwiches, making it a great option for larger families or gatherings. Whichever you choose, ensure it’s preheated for optimal results.
Managing Heat: Medium Heat for Optimal Cooking
Cooking at the right temperature is crucial. Medium heat is recommended for Turkey & Cheese Melts to prevent burning the bread while ensuring the cheese melts perfectly. If the heat is too high, the outside may become crispy while the inside remains cold. Adjust the heat as needed during cooking to achieve a golden-brown exterior and gooey cheese interior.
The Art of Flipping without Losing Ingredients
Flipping your Turkey & Cheese Melts requires a gentle touch. Use a spatula to carefully slide underneath the sandwich, ensuring that all ingredients stay intact. A quick, confident motion will help you turn the sandwich without spilling its delicious contents. If you’re worried about losing any ingredients, consider using a second spatula to stabilize the sandwich as you lift it.
Serving Suggestions and Pairings
Serving Your Melts: Creative Presentation Ideas
Presentation can elevate your Turkey & Cheese Melts from simple to spectacular. Consider cutting the sandwiches into triangles or strips for easy handling, especially for kids. Arrange them on a colorful plate and garnish with fresh herbs or a sprinkle of paprika for added flair. You can also serve them in individual servings with toothpicks for a fun, finger-food experience.
Delicious Dipping Options: Ranch Dressing and More
Enhance the flavor of your Turkey & Cheese Melts with a variety of dipping sauces. Ranch dressing is a classic choice that kids love, but don’t hesitate to experiment with other flavors. Consider serving them with marinara sauce for a pizza-inspired twist or a tangy mustard for a bit of zest. Offering a selection of dips can make the meal interactive and exciting for children.
Ideas for Side Dishes to Complete the Meal
To create a well-rounded meal, consider pairing your Turkey & Cheese Melts with side dishes that complement their flavors. Fresh fruit salad, carrot sticks, or cucumber slices add a refreshing crunch. For a heartier option, serve with a side of potato wedges or a simple green salad. These sides not only enhance the meal but also provide additional nutrients.
Storing and Reheating Leftovers
Proper Storage Techniques for Turkey & Cheese Melts
If you have leftovers, proper storage is key to maintaining their taste and texture. Allow the melts to cool completely before placing them in an airtight container. They can be refrigerated for up to three days. For longer storage, consider wrapping each sandwich in aluminum foil and freezing them. This method helps preserve their flavor and prevents freezer burn.
How to Reheat for Maximum Flavor and Texture
Reheating Turkey & Cheese Melts can be tricky, but there are effective methods to restore their deliciousness. For the best results, use a skillet or griddle on low heat, covering the sandwich with a lid to help the cheese melt evenly. If you’re in a hurry, a microwave can work, but be cautious as it may result in a soggy texture. To avoid this, place a paper towel underneath the sandwich to absorb excess moisture.
Conclusion: A Recipe for Family Bonding
Turkey & Cheese Melts are more than just a meal; they are an opportunity for families to come together in the kitchen and enjoy a satisfying dish that caters to the tastes of children. With simple ingredients and straightforward preparation, this recipe is designed to foster a love for cooking and healthy eating in young ones. As you savor these delectable melts, you’re not just feeding your family; you’re creating memories that will last a lifetime. Enjoy the process, and let the delicious flavors bring everyone together at the table!

Turkey & Cheese Melts
Ingredients
- 8.0 slices whole grain bread
- 8.0 slices turkey deli meat
- 8.0 slices cheddar cheese
- 4.0 tablespoons unsalted butter
- 0.5 teaspoon garlic powder
- 0.5 teaspoon dried oregano
- 0.25 teaspoon black pepper
- 0.25 cup mayonnaise
- 0.25 cup ranch dressing
Instructions
- Start by setting a large skillet or griddle over medium heat.
- In a small bowl, mix the softened butter with garlic powder, dried oregano, and black pepper to create a flavorful spread.
- Spread a generous amount of the seasoned butter mixture on one side of each slice of bread. This will give your melts an irresistible golden-brown crust.
- Lay four slices of bread, buttered-side down, in the skillet.
- On each slice, layer 2 slices of turkey, followed by 1 slice of cheddar cheese. If you’re using spinach, this is the time to add a few leaves on top of the cheese for added color and nutrients.
- Top each with a second slice of bread, buttered-side up.
- Cook for about 3-4 minutes or until the bottom slice is golden brown and the cheese is starting to melt.
- Carefully flip each melt using a spatula, pressing down gently to ensure maximum contact with the skillet.
- Cook for another 3-4 minutes on the other side until golden brown and the cheese is fully melted.
- Once done, remove the melts from the skillet and let them cool slightly on a cutting board.
- Slice each melt into halves or quarters, depending on preferred serving size, and serve warm with ranch dressing for dipping if desired.
- Enjoy your Ultimate Kids' Favorite Turkey & Cheese Melts together with your little ones!