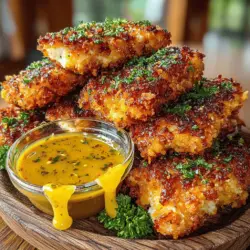
Crunchy Chicken Tenders with Sweet Honey Mustard
When it comes to comfort food, few dishes evoke as much nostalgia and satisfaction as crunchy chicken tenders. These golden-brown delights have a way of bringing people together, whether it’s for a casual family dinner or a gathering with friends. Their crispy exterior and tender, juicy interior make them a favorite among both kids and adults alike. However, what truly elevates this dish is the unique twist of pairing these chicken tenders with a homemade sweet honey mustard dip. This combination not only enhances the flavors but also adds a delightful contrast that enhances the overall dining experience.
In this recipe, you’ll discover the simplicity of preparing crunchy chicken tenders that are perfect for any occasion. With just a few basic ingredients and straightforward steps, you can whip up a batch of these tenders that will leave everyone asking for more. The beauty of this dish lies in its versatility; it can be served as a main course, an appetizer, or even as part of a fun finger food platter.
Understanding the Ingredients
To create the ultimate crunchy chicken tenders, it’s essential to understand the role of each ingredient involved in the recipe. The star of the show is undoubtedly the boneless, skinless chicken breasts. This choice is crucial, as it ensures tenderness and allows for easy cooking. Unlike other cuts of chicken that can be tougher, boneless breasts provide a juicy bite that pairs perfectly with the crispy coating.
Moving on to the breading components, you’ll need all-purpose flour, eggs, and breadcrumbs. Each of these elements plays a vital role in achieving that coveted crunch. The flour acts as the initial dry layer, helping the egg adhere to the chicken. The egg, in turn, serves as a binder, allowing the breadcrumbs to stick effectively. Finally, the breadcrumbs provide the crunch that makes each bite satisfying. For an extra texture boost, panko breadcrumbs are often recommended. These Japanese-style breadcrumbs are coarser and lighter than regular ones, resulting in an even crunchier finish.
In addition to the chicken tenders, we cannot overlook the importance of the sweet honey mustard dip. This sauce is a harmonious blend of ingredients that adds a perfect balance of sweetness and tanginess to the dish. The base of the dip consists of honey, which provides a natural sweetness, and mustard, which adds a zesty kick. The combination creates a delightful contrast that enhances the flavor of the crispy chicken tenders. A touch of mayonnaise can also be included to give the dip a creamy texture, making it even more irresistible.
Prepping the Chicken Tenders
Before diving into the breading process, proper preparation of the chicken is key. Start by rinsing the boneless, skinless chicken breasts under cold water. This step not only cleans the chicken but also allows for better adherence of seasonings. After rinsing, pat the chicken dry with paper towels. This is an important step; moisture on the chicken can prevent the breading from sticking properly, leading to a less satisfying crunch.
Once the chicken is dried, the next step is to cut the chicken breasts into strips. Aim for uniform sizes—about 1 to 1.5 inches wide—so that they cook evenly. After cutting, season the strips generously with salt and pepper. This simple seasoning enhances the natural flavor of the chicken and prepares it for the flavorful breading process ahead. Remember, even the best breading cannot save underseasoned chicken, so don’t be shy with your spices.
Setting Up the Breading Stations
With the chicken prepped, it’s time to set up your breading station. This step is crucial for achieving that perfect layer of crunch on your chicken tenders. The breading process involves three distinct stations: flour, egg, and breadcrumbs.
1. Flour Station: Start with a shallow dish filled with all-purpose flour. This will be the first coating for your chicken. Dredging the chicken strips in flour creates a dry surface that helps the egg coating adhere more effectively.
2. Egg Station: In another shallow bowl, whisk a few eggs until they are well combined. This will serve as the binding agent for your breadcrumbs. Dip each flour-coated chicken strip into the egg mixture, ensuring that it is fully coated. Let any excess egg drip off before moving to the next station.
3. Breadcrumb Station: Finally, prepare a plate with your breadcrumbs (preferably panko for that extra crunch). Coat each egg-covered chicken tender in the breadcrumbs, pressing gently to ensure an even coating. This is where you can really get creative—if you want to add extra flavor, consider mixing in some grated Parmesan cheese or your favorite spices into the breadcrumbs.
The key to achieving maximum crunch lies in the evenness of your coating. Be sure to shake off any excess breadcrumbs, as a thick layer can lead to uneven cooking and a less desirable texture. Once all your chicken tenders are breaded, you’re ready to move on to cooking them to perfection.
This initial preparation and understanding of the ingredients sets the stage for the delicious crunchiness that awaits. Stay tuned as we move on to the cooking methods and tips to get those chicken tenders golden and crispy, ready to be paired with that delightful sweet honey mustard dip.
Frying the Chicken Tenders
Frying the chicken tenders to achieve that perfect, golden-brown crunch is an essential part of this recipe. The frying process not only cooks the chicken but also creates a delightful texture that contrasts beautifully with the tender meat inside. Here’s how to fry your chicken tenders effectively:
Insights on the Frying Process
To start, choose a heavy-bottomed skillet or a deep fryer for frying your chicken tenders. Using a heavy pan helps maintain a consistent temperature, which is crucial for even cooking. You want your oil to be hot enough to create a crispy exterior without burning the coating. The ideal frying temperature is between 350°F to 375°F (175°C to 190°C).
Ideal Oil Temperature and How to Test Readiness
To test if your oil is ready for frying, you can drop a small piece of bread or a pinch of the batter into the oil. If it bubbles up and starts to brown within a few seconds, the oil is at the right temperature. Alternatively, you can use a kitchen thermometer for more precise measurement.
Importance of Frying in Batches
Frying in batches is crucial for achieving that perfect crispy texture. If you overcrowd the pan, the oil temperature will drop, leading to steaming rather than frying. This can result in soggy chicken tenders. Aim to fry about 3 to 4 tenders at a time, ensuring there’s enough space between them to allow hot air to circulate.
Tips for Knowing When the Chicken is Perfectly Cooked
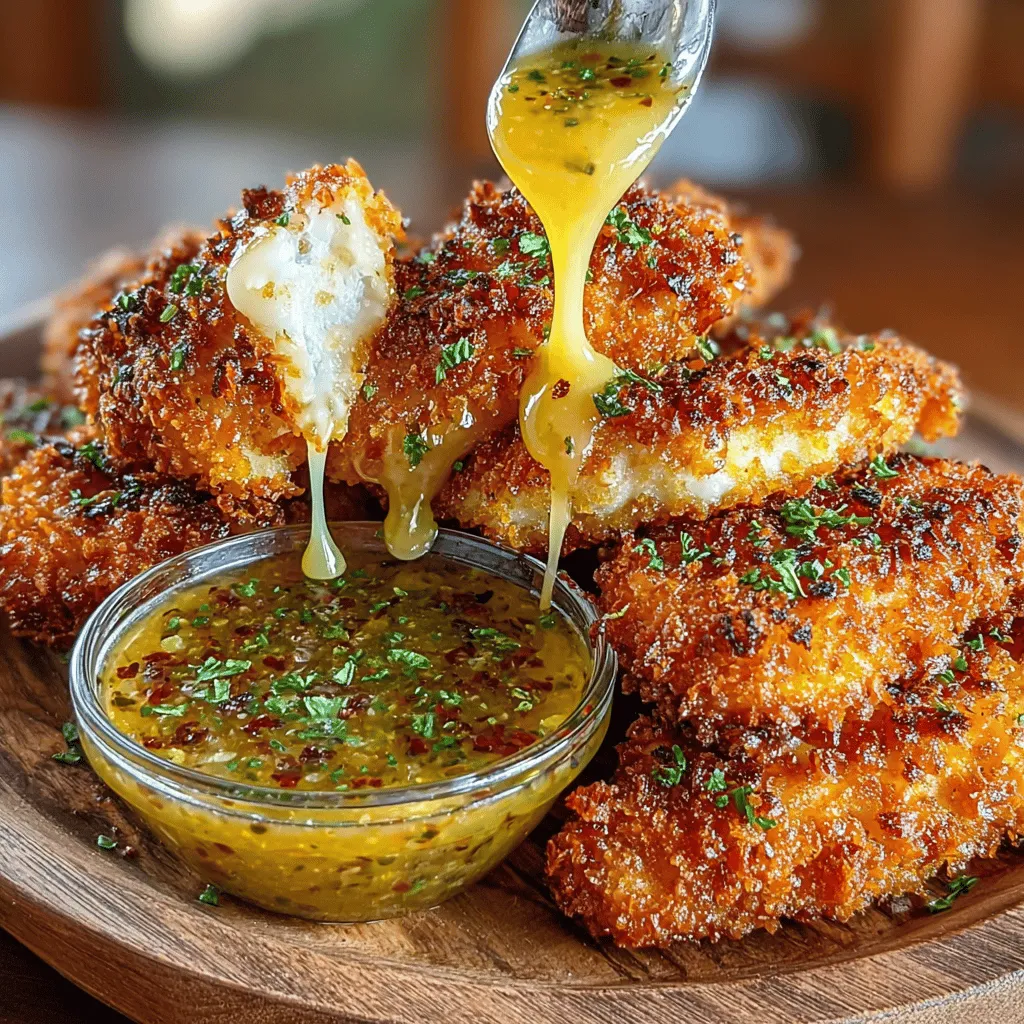
To determine if your chicken tenders are cooked through, look for a deep golden-brown color. The internal temperature should reach 165°F (75°C) to ensure they are safe to eat. You can use a meat thermometer to check this. Additionally, the juices should run clear when the chicken is pierced with a knife, not pink.
Creating the Honey Mustard Dip
The sweet honey mustard dip is the perfect complement to your crunchy chicken tenders. Making it at home allows you to customize the flavor profile to your liking. Here’s how to create this delicious dip:
Step-by-Step Guide to Making the Dip
1. Gather Your Ingredients: You will need ½ cup of Dijon mustard, ½ cup of honey, and a tablespoon of apple cider vinegar for tang.
2. Mix the Ingredients: In a small bowl, combine the Dijon mustard and honey. Whisk them together until smooth.
3. Adjust the Flavor: Add apple cider vinegar to the mixture. This will add a hint of tanginess that balances the sweetness of the honey. Taste the dip and adjust the sweetness or tanginess to your preference by adding more honey or vinegar.
4. Chill: Allow the dip to chill in the refrigerator for at least 30 minutes before serving. This helps the flavors meld together, enhancing the overall taste.
Why Homemade Dips Are Preferable
Homemade dips are preferable to store-bought versions for several reasons. Firstly, you can control the ingredients, ensuring there are no artificial preservatives or additives. Secondly, you can tailor the flavor to suit your taste, making it sweeter, spicier, or tangier based on your preferences. Lastly, the freshness of homemade dips often elevates your dining experience, making it more enjoyable.
Serving Suggestions
Presentation is key when it comes to serving your crunchy chicken tenders with sweet honey mustard. Here are some ideas for plating and pairing:
Ideas for Plating the Chicken Tenders
– Create a Stack: Arrange the chicken tenders in a neat stack on a large serving plate. This not only looks appealing but also makes it easy for guests to take what they want.
– Use Dipping Bowls: Serve the honey mustard in small bowls or ramekins alongside the chicken tenders. This adds a touch of elegance and allows each person to dip as they please.
– Garnish: Consider garnishing the plate with fresh herbs such as parsley or cilantro, or even a sprinkle of sesame seeds for added color and texture.
Suggestions for Side Dishes
To round out your meal, consider pairing your chicken tenders with side dishes that complement their crunchiness:
– Crispy Fries: Classic French fries or sweet potato fries are always a hit. Try seasoning them with a pinch of paprika or garlic powder for added flavor.
– Fresh Salad: A light salad with mixed greens, cherry tomatoes, and a tangy vinaigrette can provide a refreshing contrast to the richness of the chicken tenders.
– Coleslaw: A crunchy coleslaw can add a nice texture and a hint of acidity that balances the sweetness of the honey mustard.
Presentation Tips to Enhance the Dining Experience
– Use Colorful Plates: Brightly colored plates can make your dish pop, making the meal visually appealing.
– Serve with Lemon Wedges: Adding lemon wedges on the side not only enhances the presentation but also gives guests an option to add a zesty flavor to their tenders.
– Create a Rustic Vibe: For a more casual setting, serve the chicken tenders in a wooden basket lined with parchment paper for a rustic look.
Nutritional Information and Serving Size
When indulging in crunchy chicken tenders with sweet honey mustard, it’s important to be mindful of the nutritional content. Here’s a breakdown:
Nutritional Content
– Calories: Approximately 400 calories per serving (4 chicken tenders with dip).
– Protein: High in protein, with around 30 grams per serving.
– Fat: Depending on the frying oil used, the fat content can vary, but expect around 20 grams, primarily from the chicken and oil.
– Carbohydrates: The breading contributes approximately 30 grams of carbohydrates, primarily from flour and breadcrumbs.
Serving Size
This recipe typically serves about 4 people, with each person enjoying around 4 tenders and a generous portion of dip. This makes it an excellent choice for a family dinner or a casual gathering with friends.
Considerations for Dietary Restrictions
For those with dietary restrictions, consider these adjustments:
– Gluten-Free Options: Substitute regular flour and breadcrumbs with gluten-free alternatives such as almond flour or gluten-free breadcrumbs.
– Lower-Calorie Variants: Baking the chicken tenders instead of frying can significantly reduce the calorie content, making it a healthier option.
Conclusion
Creating your own crunchy chicken tenders with sweet honey mustard dip is not only rewarding but also incredibly satisfying. You’ve learned the ins and outs of frying, the art of crafting a homemade dip, and how to present your dish beautifully.
The delightful combination of crunchy, flavorful chicken tenders paired with the sweet and tangy dip is sure to impress anyone at your table. Whether for a family meal or a social gathering, this recipe is a winner.
We encourage you to try this recipe, enjoy the process of cooking, and savor the delicious results. Your efforts will not only lead to a delightful meal but will also create a memorable dining experience for you and your loved ones. Enjoy!