Crunchy Pita Crusted Chicken Recipe
Introduction
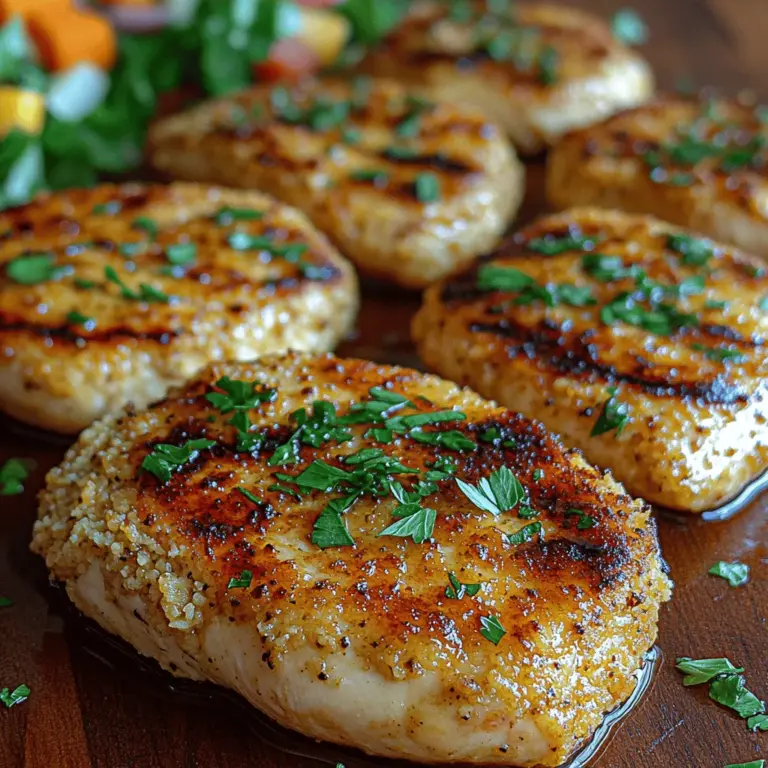
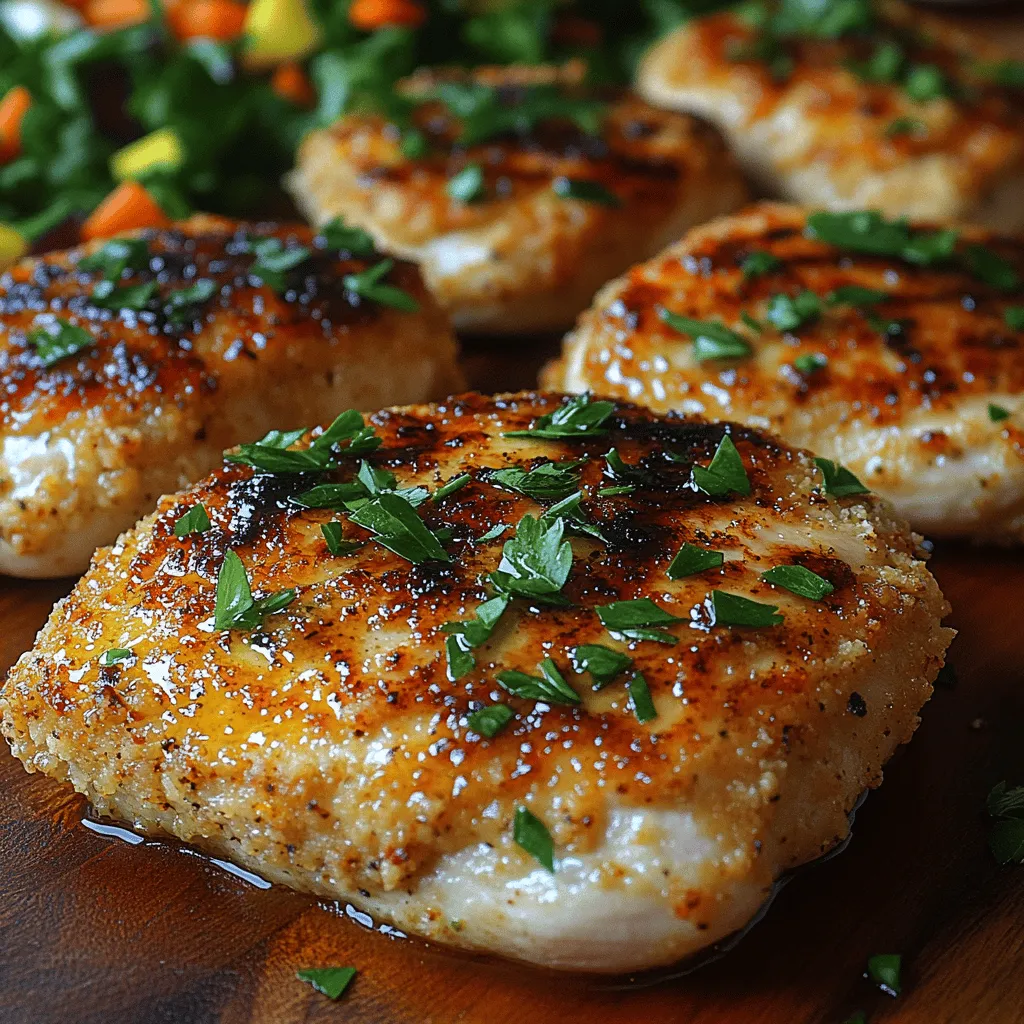
If you’re in search of a delicious, satisfying, and visually appealing dish that’s perfect for family dinners or gatherings, look no further than Crunchy Pita Crusted Chicken. This innovative recipe takes the classic idea of breaded chicken and elevates it by using pita bread for the crust. The result is a delightful crunch that complements the juicy, tender chicken underneath, creating a dish that’s sure to impress both family members and guests alike.
The unique use of pita bread not only offers a delightful texture but also adds a distinctive flavor that sets this recipe apart from conventional breaded chicken dishes. Whether you’re looking to serve it alongside a fresh salad, as part of a hearty wrap, or with a side of roasted vegetables, Crunchy Pita Crusted Chicken is versatile enough to fit any occasion. It’s an ideal choice for busy weeknights or special gatherings, offering a delightful twist on a classic favorite.
Understanding the Ingredients
To create the perfect Crunchy Pita Crusted Chicken, it’s essential to understand the role of each ingredient in the recipe. Let’s take a closer look at what makes this dish so special.
Chicken Breasts
At the heart of this recipe are boneless, skinless chicken breasts. The choice of chicken breasts is crucial for several reasons. First and foremost, boneless and skinless chicken breasts offer a lean protein source that is easy to cook and serves as a blank canvas for flavor. Nutritionally, chicken breast is low in fat and high in protein, making it an excellent choice for those seeking a healthy meal option. The mild flavor of chicken breasts allows the spices and the pita crust to shine, ensuring a harmonious balance of taste in every bite.
Pita Bread
The crust of this chicken dish is made from pita bread, which is not only a unique choice but also a beneficial one. You can opt for either plain or whole wheat pita, depending on your preference or dietary needs. Whole wheat pita adds a nutty flavor and extra fiber, enhancing the health benefits of the dish. The true magic of using pita bread lies in its ability to create a crunchy texture when processed into crumbs. This crunchiness adds an exciting contrast to the tenderness of the chicken, making each bite a delightful experience.
Buttermilk Marinade
To ensure that the chicken is flavorful and juicy, a buttermilk marinade is used. Buttermilk is known for its tenderizing properties, which help break down the proteins in the chicken, resulting in a more succulent final product. The marinade is enhanced with spices such as garlic powder, paprika, cumin, salt, and pepper, each contributing its unique flavor profile. Garlic powder adds depth, paprika offers a hint of smokiness, and cumin brings warmth and earthiness, while salt and pepper enhance the overall taste.
Coating Elements
The dredging process is vital for achieving that coveted crispy crust. In addition to the pita crumbs, flour and eggs play significant roles in the coating process. The flour helps to create a dry surface on the chicken, allowing the egg to adhere better when it’s coated. The egg wash acts as a glue for the pita crumbs, ensuring they stick to the chicken during cooking. This combination of ingredients creates a beautifully crisp crust that encases the juicy chicken, resulting in a satisfying bite every time.
Step-by-Step Preparation
Now that we’ve discussed the ingredients, let’s delve into the preparation process, starting with marinating the chicken.
Marinating the Chicken
To maximize flavor and tenderness, marinating the chicken is essential. Begin by placing the boneless, skinless chicken breasts in a large bowl or a resealable plastic bag. Pour in enough buttermilk to completely submerge the chicken, ensuring that each piece is well-coated. The recommended marinating time is at least 1 hour, but for optimal results, you can let it marinate for up to 12 hours in the refrigerator. This extended marinating time allows the buttermilk to fully penetrate the meat and infuse it with flavor while tenderizing it to perfection.
You can also add the spices—garlic powder, paprika, cumin, salt, and pepper—directly to the buttermilk before adding the chicken. This not only enhances the flavor of the marinade but also ensures that the spices adhere to the chicken during the cooking process.
Creating the Pita Crust
While the chicken is marinating, you can prepare the pita crust. Start by taking your pita bread and cutting it into smaller pieces. Place these pieces into a food processor and pulse until you achieve a fine crumb. The texture of the crumbs is crucial; you want them to be coarse enough to provide crunch but fine enough to adhere well to the chicken.
If you don’t have a food processor, you can also place the pita in a resealable bag and crush it using a rolling pin. This method works just as well and can be a fun way to involve kids in the kitchen. Once you have your pita crumbs ready, set them aside while you prepare the dredging station.
Setting Up the Dredging Station
Setting up a dredging station is a key step in ensuring that your chicken gets a well-balanced coating. Begin by placing three shallow dishes in a row. In the first dish, add all-purpose flour seasoned lightly with salt and pepper. In the second dish, crack a few eggs and whisk them until smooth. In the third dish, place the prepared pita crumbs.
To coat the chicken, take one piece from the marinade, allowing any excess buttermilk to drip off. First, dredge it in the flour, making sure to coat it evenly. Next, dip it into the egg mixture, ensuring it is fully covered before finally pressing it into the pita crumbs. Make sure to coat the chicken thoroughly in the crumbs, pressing gently to help them adhere. Repeat this process with each piece of chicken, setting them aside on a plate once coated.
By following these initial steps, you’ll be well on your way to creating a delicious Crunchy Pita Crusted Chicken that’s not only flavorful but also visually appealing, ready to be baked or fried to crispy perfection.
Visual Guide for a Well-Organized Dredging Station
Creating a well-organized dredging station is fundamental to achieving the perfect coating on your Crunchy Pita Crusted Chicken. Start by setting up three shallow dishes: one for flour, one for beaten eggs, and one for the crushed pita crumbs. Label each dish clearly to avoid any confusion during the dredging process.
In your flour dish, add a pinch of salt and pepper for seasoning. Beat a couple of eggs in a bowl, ensuring they are fully blended. For the pita crumbs, pulse the pita bread in a food processor until they reach a fine crumb consistency. You can also season the crumbs with herbs like oregano or paprika for an added flavor kick.
Having everything in place will streamline the coating process and ensure your chicken is evenly coated, resulting in a delightful crunch.
Coating the Chicken
Techniques for Ensuring Even Coating with Flour, Egg, and Pita Crumbs
To achieve an even coating on your chicken, follow these steps carefully:
1. Dredge in Flour: Start by taking one piece of chicken and lightly coating it in flour. Shake off the excess flour; this step is crucial to prevent clumping and ensure that the egg adheres properly.
2. Dip in Egg: Next, dip the floured chicken into the beaten egg. Make sure the chicken is fully submerged, allowing it to absorb the egg mixture. This step acts as a glue, ensuring the pita crumbs stick firmly.
3. Coat with Pita Crumbs: Finally, roll the chicken in the crushed pita crumbs. Press down gently to ensure the crumbs adhere well. A good tip here is to use your other hand to sprinkle crumbs over the chicken instead of dipping; this avoids excess moisture and prevents clumping.
Discussion on Pressing Crumbs for Optimal Adherence
When coating the chicken, pressing the crumbs firmly is essential for achieving maximum adherence. After rolling the chicken in pita crumbs, take a moment to gently press them onto the surface. This action ensures that the crumbs stick during baking, resulting in a crispy exterior that provides that satisfying crunch with each bite.
Baking the Chicken
Preparing for the Oven
Once your chicken is coated, it’s time to prepare for baking. Line a baking sheet with parchment paper or a silicone baking mat to prevent sticking and make cleanup easier. Place a cooling rack on top of the baking sheet. This allows hot air to circulate around the chicken, promoting even cooking and crispiness.
When placing the chicken on the rack, ensure there’s space between each piece. Overcrowding the pan can lead to steaming rather than baking, which will compromise the desired crunchiness.
Importance of Oil for Achieving a Golden Crust
Drizzling a small amount of oil over the coated chicken is a critical step for achieving that golden-brown color and crunchy texture. Use a cooking spray or brush a thin layer of olive oil over the top of each piece. This will not only help the crumbs to crisp up but will also enhance the flavor.
Cooking Time and Temperature
How to Know When the Chicken is Perfectly Cooked
Preheat your oven to 400°F (200°C). Place the prepared chicken in the oven and bake for about 20-25 minutes. To check for doneness, use a meat thermometer inserted into the thickest part of the chicken. The internal temperature should reach 165°F (74°C) for safe consumption.
You’ll know the chicken is perfectly cooked when the crust is golden and crispy, and the juices run clear when pierced. If you prefer an extra crispy finish, broil the chicken for an additional 2-3 minutes at the end of the baking time, keeping a close eye to prevent burning.
Internal Temperature Guidelines for Safety
Always prioritize food safety when cooking chicken. The USDA recommends that chicken be cooked to an internal temperature of 165°F (74°C). Investing in a good meat thermometer can help ensure that your chicken is cooked thoroughly while remaining juicy and tender inside.
Serving Suggestions
Presentation Ideas
Once your Crunchy Pita Crusted Chicken is out of the oven, it’s time to present it beautifully. Arrange the chicken pieces on a serving platter, and garnish with freshly chopped parsley for a pop of color. This not only adds visual appeal but also brings a fresh flavor to the dish.
Consider serving the chicken alongside lemon wedges; a squeeze of fresh lemon can elevate the flavors and complement the crunchiness beautifully.
Ideas for Side Dishes that Complement the Crunchy Chicken
Pair your chicken with sides that balance its texture and flavors. Here are a few suggestions:
– Greek Salad: A refreshing Greek salad with cucumbers, tomatoes, olives, and feta cheese can provide a delightful contrast to the crispy chicken.
– Roasted Vegetables: Seasonal roasted vegetables tossed in olive oil and herbs can enhance the meal’s nutritional value.
– Quinoa or Rice Pilaf: A light quinoa or rice pilaf can add a hearty, wholesome element, making the meal more filling.
Pairing with Dipping Sauces
Recommended Dipping Sauces for Added Flavor
Dipping sauces can elevate your Crunchy Pita Crusted Chicken to new heights. Consider serving with:
– Tzatziki Sauce: A refreshing yogurt-based sauce made with cucumbers, garlic, and dill complements the crunchiness while adding a cool contrast.
– Honey Mustard: A sweet and tangy honey mustard sauce provides a delightful contrast to the savory chicken.
– Spicy Marinara: For those who enjoy a bit of heat, a spicy marinara sauce adds depth and richness to the dish.
How Sauces Can Enhance the Overall Dining Experience
Dipping sauces not only enhance the flavor but also add an interactive element to your meal. Encourage your guests to mix and match sauces with their chicken pieces, creating a fun and personalized dining experience. This variety can also cater to different taste preferences, making your dish appealing to everyone.
Nutritional Information
Caloric Breakdown
Understanding the caloric content of your meal helps in maintaining a balanced diet. A serving of Crunchy Pita Crusted Chicken typically contains around 350-400 calories, depending on the size of the chicken pieces and the amount of oil used.
For a healthier option, consider using less oil or opting for baked sweet potatoes or a side salad to round out the meal without adding excessive calories.
Health Benefits of Key Ingredients
The key ingredients in this dish not only contribute to its great taste but also provide a range of health benefits:
– Chicken: A great source of lean protein, chicken supports muscle growth and repair while being low in fat, especially when skinless.
– Pita Bread: Whole wheat pita provides fiber, which is beneficial for digestion and helps maintain satiety.
– Spices: Common spices such as garlic powder, paprika, and oregano have antioxidant properties, which can support overall health.
Conclusion
The Crunchy Pita Crusted Chicken is not just a meal; it’s an experience. With its delightful crunch, flavorful coating, and ease of preparation, it stands out as a go-to dish for family dinners or entertaining guests.
This recipe showcases the versatility of chicken, the unique texture of pita crust, and the ease with which you can create a restaurant-quality dish at home. From the initial coating to the final presentation, each step contributes to a delicious outcome that is bound to please.
We encourage you to try this recipe, customize it to your taste, and share your experiences with friends and family. Whether enjoyed on its own or paired with your favorite sides and sauces, this chicken dish promises satisfaction and delight in every bite.
