Title: Crunchy Chicken Tenders with Honey Mustard Dip: A Deliciously Crispy Delight
Introduction
Exploring the world of homemade fried chicken can lead to a culinary adventure that tantalizes the taste buds and brings joy to any meal. Crunchy chicken tenders are a popular choice for both adults and kids, offering a satisfying crunch and juicy interior. This recipe for Crunchy Chicken Tenders paired with a delectable honey mustard dip is perfect for family dinners, game day snacks, or casual gatherings. In this article, we’ll provide a detailed guide on how to prepare these delicious tenders along with insights into the ingredients and techniques that contribute to their irresistible flavor and texture.
Understanding the Ingredients
Delving into the components of the recipe is essential for achieving the best results. Each ingredient plays a pivotal role in flavor, texture, and overall outcome.
The Chicken: Choosing the Right Cut
When it comes to chicken tenders, chicken breasts are typically the go-to choice. They are lean, tender, and have a mild flavor that can easily absorb seasonings. Selecting fresh chicken is crucial for creating the best tenders possible. Look for chicken breasts that are pale in color, plump, and free from any blemishes. The texture should be firm to the touch, indicating freshness.
If you prefer a richer flavor, you can also opt for chicken thighs. Thighs contain more fat, which contributes to juiciness and can provide a deeper flavor profile. While the texture may differ slightly, the result will still be delicious. Ultimately, the choice between breasts and thighs depends on personal preference and dietary considerations.
Marination: The Key to Flavor
One of the secrets to achieving tender, flavorful chicken tenders lies in the marination process. Buttermilk is a key ingredient in this recipe, serving a dual purpose. First, it acts as a tenderizer due to its acidity, breaking down the proteins in the chicken and making it more succulent. Secondly, buttermilk adds a subtle tang that enhances the overall flavor of the tenders.
To maximize flavor penetration, it’s recommended to marinate the chicken for at least 2 hours, or ideally overnight. This extended marination time allows the seasonings to fully infuse the chicken. A simple seasoning blend consisting of paprika, garlic powder, onion powder, salt, and black pepper will elevate the taste of the chicken. Paprika adds a hint of smokiness, while garlic and onion powders provide aromatic depth. Adjust the quantities of these spices according to your taste preferences.
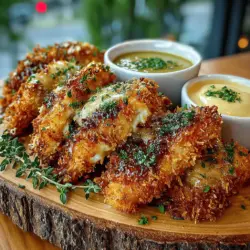
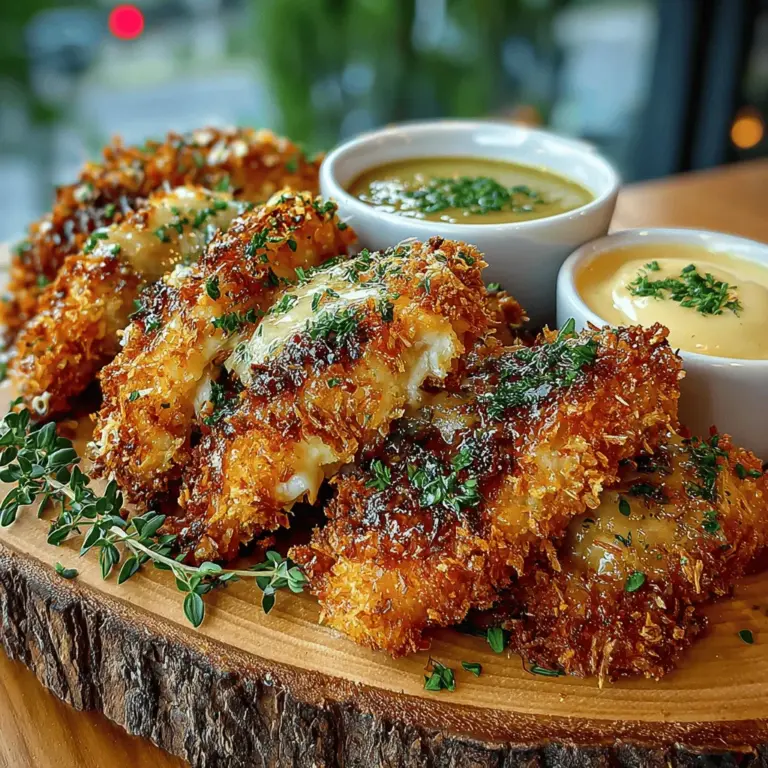
The Coating: Achieving the Perfect Crunch
The coating is what makes these chicken tenders truly stand out. To achieve that characteristic crunch, a combination of all-purpose flour and panko breadcrumbs is recommended. While all-purpose flour provides a solid base for the coating, panko breadcrumbs contribute a light and airy texture that results in a delightful crunch when fried.
For an added layer of flavor, incorporating dried thyme and a pinch of cayenne pepper into the coating mixture can enhance the overall taste. Thyme adds an earthy note, while cayenne pepper introduces a subtle kick that balances the richness of the chicken.
To ensure the coating adheres well to the chicken, it’s important to follow a specific dredging technique. Start by removing the marinated chicken from the buttermilk, allowing any excess liquid to drip off. Then, dredge the chicken in the flour mixture, pressing gently to ensure an even coating. Afterward, dip the chicken back into the buttermilk before coating it with panko breadcrumbs. This double-dipping technique ensures that the crunchy layer sticks well during frying, creating that satisfying crispiness.
Frying: Techniques for Perfectly Crispy Tenders
Frying is the final step in creating these crunchy chicken tenders. The right frying technique is essential for achieving a golden-brown exterior while keeping the chicken juicy on the inside. Begin by heating a few inches of oil in a heavy-bottomed pot or a deep fryer to the ideal frying temperature of 350°F (175°C). It’s crucial to maintain this temperature throughout the frying process to ensure even cooking.
Carefully add the coated chicken tenders to the hot oil, taking care not to overcrowd the pot, as this can cause the temperature to drop and result in soggy tenders. Fry the chicken in batches, cooking for about 5-7 minutes on each side or until they are golden brown and cooked through. Using a meat thermometer can help confirm that the internal temperature reaches 165°F (74°C), ensuring that the chicken is safe to eat.
Once fried, allow the chicken tenders to drain on a paper towel-lined plate to absorb any excess oil. This step is crucial for maintaining their crunchiness.
In the next section of the article, we will explore the delightful honey mustard dip that perfectly complements these crunchy chicken tenders, adding a sweet and tangy flavor that enhances the overall experience.
Selecting the Right Oil for Frying
When it comes to frying chicken tenders, the choice of oil is crucial for achieving that perfect crunch. Opt for oils with a high smoke point, which allows for frying at high temperatures without burning. Popular choices include:
– Canola Oil: With a smoke point of around 400°F (204°C), canola oil is a versatile and neutral-tasting option.
– Peanut Oil: This oil has a smoke point of approximately 450°F (232°C) and imparts a subtle nutty flavor, making it ideal for frying.
– Vegetable Oil: A blend of different oils, vegetable oil typically has a smoke point of about 400°F (204°C), making it another good choice for frying.
By selecting the right oil, you ensure that your chicken tenders will not only cook evenly but also achieve that coveted crispy exterior.
The Importance of Oil Temperature
Maintaining the oil temperature is essential for frying chicken tenders to perfection. Ideally, you want the oil to be around 350°F (175°C). If the oil is too hot, the outside of the chicken tenders may burn before the inside is cooked through. Conversely, if the oil is too cool, the tenders will absorb excess oil, resulting in greasy, unappetizing pieces.
To ensure you reach the right temperature, use a deep-fry thermometer. If you don’t have one, you can test the oil by dropping in a small piece of bread; it should sizzle and turn golden brown in about 60 seconds when the oil is at the right temperature.
Tips for Frying in Batches
Frying in batches is key to achieving evenly cooked chicken tenders. Here are some tips to keep in mind:
1. Don’t Overcrowd the Pan: Adding too many tenders at once can lower the oil temperature significantly, leading to soggy chicken. Fry in small batches, allowing enough space for each piece to cook thoroughly.
2. Monitor the Oil Temperature: After adding the chicken, keep an eye on the thermometer. You may need to adjust the heat to maintain a consistent 350°F (175°C).
3. Turn the Tenders: Halfway through the cooking time, gently flip the tenders to ensure even browning on both sides. This will help them achieve that golden, crunchy exterior.
4. Use a Slotted Spoon: Once the chicken tenders are cooked, use a slotted spoon to remove them from the oil. Let them drain on paper towels to absorb excess oil.
How to Check for Doneness
To ensure your chicken tenders are safely cooked, checking for doneness is essential. The best method is to use a meat thermometer. Insert the thermometer into the thickest part of the tender; it should read 165°F (74°C) to ensure the chicken is fully cooked.
If you don’t have a thermometer, you can also cut into one of the tenders; the meat should be opaque and the juices should run clear. This is a reliable method, but using a thermometer is the most accurate way to guarantee safety and prevent undercooked chicken.
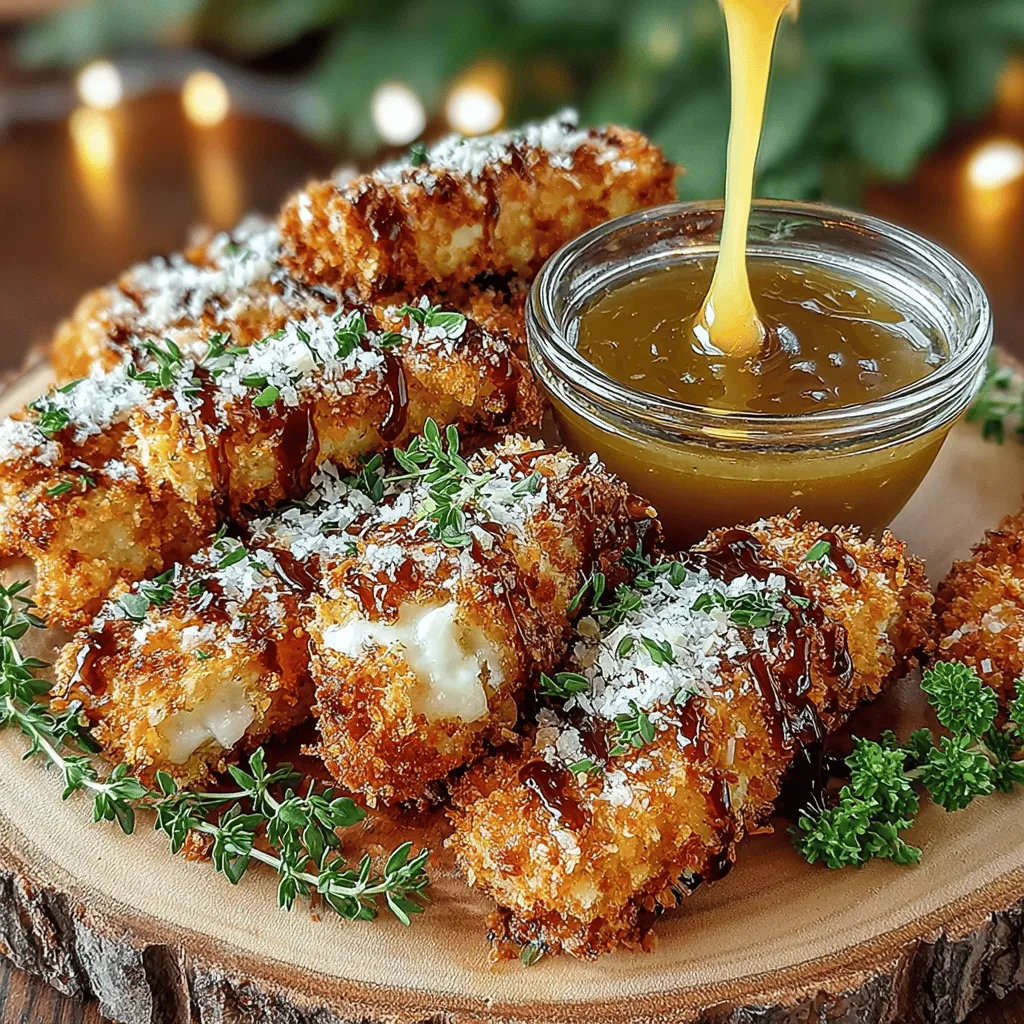
Making the Honey Mustard Dip
Ingredients Breakdown
To elevate your crunchy chicken tenders, a honey mustard dip is the perfect accompaniment. Here’s what you’ll need:
– Mayonnaise: About ½ cup, this serves as the creamy base of the dip.
– Honey: 2 tablespoons, which adds sweetness and balances the tanginess of the mustard.
– Dijon Mustard: 2 tablespoons, providing the dip with a sharp and zesty flavor.
– Apple Cider Vinegar: 1 tablespoon, to add a touch of acidity and brightness.
Balancing Flavors for the Perfect Dip
The key to a great honey mustard dip lies in balancing the flavors. Start by mixing the mayonnaise, honey, and Dijon mustard in a bowl. Taste the mixture and adjust the ingredients according to your preference. If you prefer a sweeter dip, add more honey; if you prefer it tangier, increase the mustard or vinegar.
Mix thoroughly until smooth, and ensure all ingredients are well incorporated for a harmonious flavor profile.
Customizing the Dip: Variations and Adjustments
Feel free to get creative with your honey mustard dip! Here are a few variations to consider:
– Spicy Honey Mustard: Add a pinch of cayenne pepper or a few dashes of hot sauce to introduce some heat.
– Garlic Honey Mustard: Incorporate minced garlic or garlic powder for a savory twist.
– Herbed Honey Mustard: Mix in fresh herbs such as dill or parsley for an aromatic touch.
Experiment with these variations to find the perfect dip that suits your taste!
Serving Suggestions
Creative Plating Ideas for Presentation
Presentation plays a big role in enhancing your meal experience. Here are some creative plating ideas for your crunchy chicken tenders:
– Platter Style: Arrange the chicken tenders in a circular pattern on a large platter, with the honey mustard dip in the center for dipping.
– Skewered Presentation: Thread the chicken tenders onto skewers for a fun and casual serving option, perfect for parties.
– Bento Box: Create a bento-style meal with chicken tenders, colorful vegetable sticks, and a small container of honey mustard dip for an appealing, balanced plate.
Recommended Side Dishes
Pair your crunchy chicken tenders with complementary side dishes for a complete meal:
– Coleslaw: The crispness and tang of coleslaw contrast beautifully with the crunchy texture of the tenders.
– Sweet Potato Fries: This sweet and savory combination makes for a delightful taste experience.
– Mac and Cheese: A comforting classic that pairs well with the crunch of chicken tenders.
– Garden Salad: Light and refreshing, a garden salad balances the richness of the tenders.
Pairing Beverages
To elevate your meal experience, consider these beverage pairings:
– Iced Tea: A refreshing option that complements the flavors of the dish.
– Lemonade: The sweetness and acidity of lemonade make it a great match for fried chicken.
– Light Beer: A crisp lager or pilsner enhances the crunchiness of the tenders without overpowering them.
Nutritional Information
Overview of Nutritional Value
Crunchy chicken tenders provide a satisfying meal option that balances protein and carbohydrates. Here’s a general overview of the nutritional content per serving (about 3 tenders with dip):
– Calories: Approximately 300-400 calories, depending on the frying method and dip portion.
– Protein: Around 25 grams, which supports muscle health and satiety.
– Fat: Roughly 15-20 grams, mainly from the cooking oil and mayonnaise in the dip.
– Carbohydrates: About 20-25 grams, primarily from the breading.
Discussion on Portion Sizes and Calories per Serving
When indulging in crunchy chicken tenders, portion control is essential, especially if you’re mindful of calorie intake. Typically, a serving consists of 3-4 tenders, which strikes a balance between satisfaction and moderation.
For those looking to manage their calorie consumption, consider serving smaller portions or pairing with lighter side dishes, such as steamed vegetables or a fresh salad.
Tips for Making the Dish Healthier Without Sacrificing Flavor
If you’re interested in making your chicken tenders a bit healthier, here are some tips:
1. Bake Instead of Fry: For a lower-calorie option, try baking the tenders instead of frying. Coat them lightly with oil and bake at 425°F (218°C) for 20-25 minutes, flipping halfway through.
2. Whole Wheat Breading: Use whole wheat breadcrumbs or crushed whole grain cereal for added fiber without compromising crunchiness.
3. Greek Yogurt Dip: Substitute mayonnaise with Greek yogurt in your honey mustard dip for a protein boost and reduced calories.
Conclusion
Crunchy chicken tenders offer a delightful combination of texture and flavor that is sure to please any palate. With a straightforward preparation process and the option to customize the honey mustard dip, this dish is not only easy to make but also versatile enough to fit various occasions. Whether you’re hosting a gathering or enjoying a cozy night in, these chicken tenders will undoubtedly become a favorite in your recipe collection.
Embrace the joy of cooking and savor the satisfaction of creating a delicious meal from scratch. Enjoy the crispy goodness and the delightful dip that brings it all together!