Introduction
As the leaves begin to change color and the air turns crisp, the excitement of the back-to-school season seamlessly blends with the anticipation of Halloween. This time of year is not just about pencils and notebooks; it’s also an opportunity for creativity in the kitchen. What better way to celebrate this delightful transition than with a festive treat that captures the spirit of both occasions? Introducing Back-to-School Pastel Halloween Bites—a colorful and easy-to-make snack that is perfect for snack time, classroom parties, or simply enjoying at home with family and friends. In this blog post, we’ll guide you through the process of creating these festive bites, ensuring that they are not only delicious but also visually appealing and fun for everyone involved.
Understanding the Appeal of Pastel Halloween Bites
The Perfect Blend of Seasons
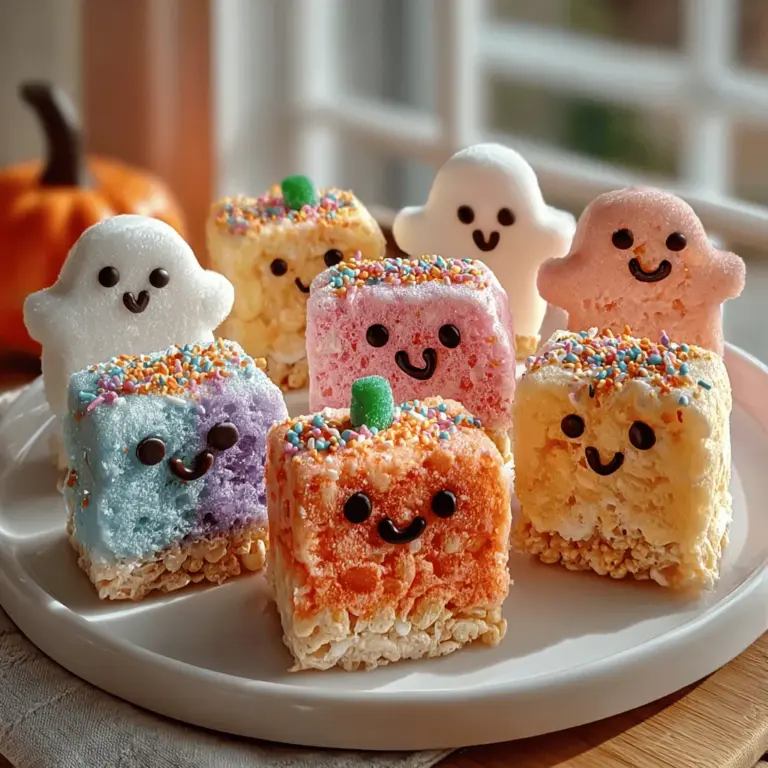
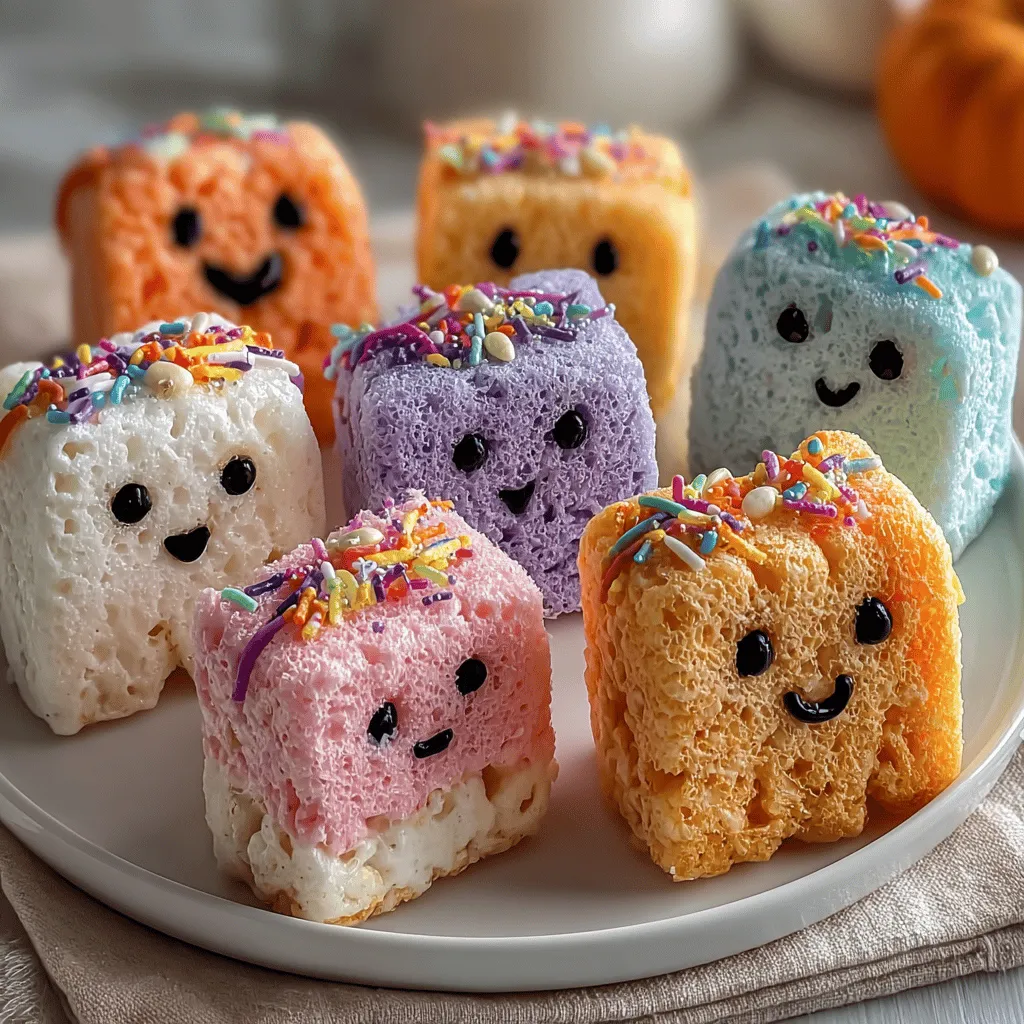
Back-to-school season often evokes feelings of fresh beginnings and new adventures, while Halloween brings forth a sense of whimsy and playful spookiness. The Back-to-School Pastel Halloween Bites serve as a bridge between these two seasons, encapsulating the essence of both. The pastel colors—soft pinks, blues, and yellows—evoke a feeling of warmth and comfort associated with school days, while the Halloween theme brings in an element of fun and festivity. This combination makes these treats a delightful addition to any gathering, capturing the imagination of children and adults alike.
Visual Delight and Flavor Harmony
One of the most appealing aspects of these pastel bites is their striking visual presentation. The combination of pastel-colored candy melts with traditional Halloween-themed sprinkles creates a feast for the eyes. This visual delight is complemented by a harmonious blend of flavors that appeal to a wide audience. The sweetness of the candy melts combined with the nuttiness of peanut butter and the chewy texture of mini marshmallows creates a delightful balance that is both satisfying and enjoyable. These bites are not just treats; they are an experience that brings joy to every occasion.
Ingredients Overview
To create these Back-to-School Pastel Halloween Bites, you’ll need a few key ingredients that work together to achieve the perfect balance of flavor and texture.
– Pastel-colored candy melts: These vibrant candy melts form the colorful base of the bites, making them visually appealing and enticing for kids and adults alike. The variety of colors can also be customized to fit any occasion, allowing for endless creativity.
– Crispy rice cereal: This ingredient adds a delightful crunch to the bites, providing texture that contrasts beautifully with the creamy elements. The crispy rice cereal is light and airy, making it a perfect companion to the denser components.
– Mini marshmallows: These little treats introduce a chewy texture, enhancing the overall appeal of the bites. Their sweetness also complements the other flavors, creating a balanced taste experience.
– Halloween-themed sprinkles: Sprinkles add a fun and festive touch to the bites, making them perfect for Halloween celebrations. They come in various shapes and colors, allowing you to personalize your treats.
– Peanut butter or nut butter: This ingredient enriches the flavor profile of the bites while adding creaminess. The nutty flavor pairs exceptionally well with the sweetness of the candy melts, creating a mouthwatering combination.
– Vanilla extract: A small addition of vanilla extract enhances the overall taste, bringing a subtle depth of flavor that ties the ingredients together.
– Cookie cutters: Essential for shaping the bites into festive forms, cookie cutters allow you to create themed shapes that align with the Halloween spirit, making your treats even more appealing.
– Edible glitter (optional): For those who want to add an extra touch of sparkle, edible glitter can be sprinkled on top for a magical finish that is sure to impress.
Step-by-Step Instructions
Now that you have a clear understanding of the ingredients, it’s time to dive into the step-by-step process of creating your Back-to-School Pastel Halloween Bites. Let’s start with the first crucial step: melting the candy.
Melt the Candy
Begin by preparing a microwave-safe bowl for your pastel-colored candy melts. Depending on the quantity you wish to make, approximately two cups of candy melts should suffice for a batch. Place the candy melts in the bowl and microwave them on medium power in 30-second intervals. Stirring between each interval is essential to ensure even melting and to prevent the chocolate from scorching. Aim for a smooth, pourable consistency that is free of lumps. If you find the mixture too thick, you can add a teaspoon of vegetable oil to help thin it out without compromising the flavor.
Combine Ingredients
Once your candy melts are perfectly melted and smooth, it’s time to incorporate the peanut butter and vanilla extract. Add about half a cup of peanut butter to the melted candy, along with a teaspoon of vanilla extract. Use a spatula to mix these ingredients thoroughly until they form a cohesive blend. This mixture should be smooth and well-combined, with the peanut butter providing a creamy base that will enhance the flavor of your Halloween bites.
Add the Cereal and Marshmallows
Now comes the fun part—adding the crispy rice cereal and mini marshmallows. Gently fold in three cups of crispy rice cereal along with one cup of mini marshmallows. It’s important to incorporate these ingredients carefully to avoid crushing the cereal or marshmallows. The goal is to achieve a well-distributed mixture where the cereal and marshmallows are evenly coated in the candy and peanut butter blend, creating a delightful combination of textures.
As you mix, take a moment to appreciate the vibrant colors and festive feel of your mixture. This is the stage where the magic begins to happen, and your Back-to-School Pastel Halloween Bites are starting to come together!
Stay tuned for the next part of this article, where we’ll explore shaping your bites into festive forms, decorating them with sprinkles, and adding those final touches that will make your treats truly shine.
Prepare the Baking Dish
To create the perfect base for your Back-to-School Pastel Halloween Bites, the first step is to prepare your baking dish. A 9×9-inch square pan is ideal for this recipe, but feel free to use a different size if you prefer. Start by lining the baking dish with parchment paper. This not only prevents the mixture from sticking but also makes it easier to remove the bites once they have set.
Tips on Lining the Baking Dish
1. Cut the Parchment Paper: Cut a piece of parchment paper that fits the bottom of the dish. For easy removal, allow the paper to hang over the edges of the pan. This will create handles that make lifting the bites out of the pan a breeze.
2. Grease the Pan: Even if you’re using parchment paper, lightly grease the paper and the sides of the dish with cooking spray or a small amount of oil. This extra step ensures that your bites won’t stick, allowing for a smoother removal.
3. Ensure an Even Layer: Pour the mixture into the lined pan, and use a spatula to spread it evenly across the surface. Gently press down to create a compact and even layer, which is essential for the bites to hold their shape once cut.
Chill and Set
Once your mixture is in the baking dish, it’s time to chill and set. This crucial step allows the bites to firm up, making them easier to cut into shapes later.
Importance of Chilling the Mixture
Chilling the mixture helps the ingredients bind together, enhancing the texture and flavor. Place the baking dish in the refrigerator for at least 1-2 hours. You’ll know the mixture is ready for cutting when it feels firm to the touch and holds its shape when lightly pressed.
Cut into Shapes
Now comes the fun part: cutting the chilled mixture into festive shapes! Using cookie cutters is a simple way to create exciting designs that will appeal to kids and adults alike.
Instructions for Using Cookie Cutters Effectively
1. Select Your Shapes: Choose a variety of Halloween-themed cookie cutters, such as pumpkins, ghosts, or bats. Having multiple shapes allows for a more visually appealing presentation.
2. Prepare the Work Surface: Lightly dust your cutting board or countertop with powdered sugar or cornstarch to prevent sticking. This will help your shapes come out cleanly without tearing.
3. Cutting the Shapes: Remove the chilled mixture from the refrigerator and lift it out of the pan using the parchment paper handles. Place it on your prepared surface. Press the cookie cutter firmly into the mixture and give it a slight twist to cut through. Lift the cutter straight up to reveal your festive shape. If any bits stick inside the cutter, use a toothpick or a small knife to gently dislodge them.
4. Repeat: Continue cutting out shapes until you’ve used up all the mixture. Gather the scraps together and press them back into a flat layer to cut more shapes if desired.
Decorate
Time to give your Back-to-School Pastel Halloween Bites a dazzling finish! Decorating not only enhances the visual appeal of your treats but also adds an extra layer of fun and flavor.
Ideas for Decorating the Bites
1. Sprinkles: After cutting your shapes, consider rolling the edges in colorful sprinkles for a festive touch. Choose a mix of pastel colors to maintain the theme, or go bold with traditional Halloween colors like black and orange.
2. Edible Glitter: For an extra special effect, lightly dust the bites with edible glitter. This will give your treats a magical shimmer, perfect for Halloween festivities.
3. Chocolate Drizzle: If you want to elevate your bites even further, melt some chocolate and drizzle it over the top. Use white chocolate for a striking contrast against the pastel colors.
Serve and Enjoy
Your Back-to-School Pastel Halloween Bites are now ready to be served! Presentation plays a key role in making your treats even more enticing.
Suggestions for Presentation
1. Platter Display: Arrange the bites on a decorative platter, alternating shapes and colors for visual interest. You could use Halloween-themed plates or a simple white platter to let the colors stand out.
2. Cupcake Liners: For individual servings, place each bite in a small cupcake liner. This adds a cute touch and makes it easy for guests to grab one (or two!).
3. Occasions to Enjoy: These bites are perfect for a variety of occasions, from Halloween parties and school treats to fall gatherings. They also make a great addition to lunchboxes or after-school snacks.
Nutritional Information
Analyzing the Nutritional Profile
As with any treat, it’s important to be aware of the nutritional content of your Back-to-School Pastel Halloween Bites. Below is a general overview:
– Calories: Each bite contains approximately 80-100 calories, depending on the specific ingredients used and the size of the bites.
– Sugar Content: The sugar content can vary, typically ranging from 6-10 grams per bite. This will depend on the sweeteners and any added decorations.
– Potential Allergens: Common allergens to consider include nut butters (for those with nut allergies) and gluten if you’re using traditional cereals. Be sure to check labels and adjust ingredients based on dietary needs.
Creative Variations
Exploring Alternative Ingredients
One of the great things about this recipe is its versatility. You can customize the Back-to-School Pastel Halloween Bites to suit various dietary preferences or to simply mix things up.
1. Different Nut Butters: If you want to change the flavor profile, try using almond butter, sunflower seed butter, or even pumpkin seed butter instead of peanut butter. Each will impart a unique taste to your bites.
2. Cereal Choices: Swap out the cereal for gluten-free options, such as rice puffs or gluten-free oats, to accommodate those with dietary restrictions. You can also experiment with different flavors of cereals to enhance the taste.
Seasonal Adaptations
This recipe isn’t just for Halloween! You can easily adapt it for other festive occasions:
– Thanksgiving: Use fall-themed cookie cutters like leaves and turkeys, and incorporate flavors like cinnamon or nutmeg into the mixture.
– Christmas: Shape the bites into stars, Christmas trees, or snowflakes, and decorate them with red and green sprinkles or edible glitter.
Incorporating Fun and Learning
Engaging Kids in the Kitchen
Making Back-to-School Pastel Halloween Bites can be a fun and educational experience for children. Here are some suggestions for getting kids involved:
– Measuring Ingredients: Teach kids about measurements and fractions by allowing them to measure out the ingredients. This not only helps with cooking skills but also reinforces math concepts.
– Creative Decorating: Let children take the lead when it comes to decorating the bites. They can choose their favorite sprinkles, arrange the bites on a platter, and even create their own designs.
Using the Recipe for Classroom Activities
These treats can also serve as a great educational tool in classroom settings:
– Math Measurements: Use the recipe as a practical application of math by having students calculate ingredient amounts for different serving sizes.
– Art Projects: Encourage creativity by having students design their own Halloween-themed packaging for the bites or create drawings inspired by the treats. This can enhance their fine motor skills while fostering creativity.
Conclusion
Back-to-School Pastel Halloween Bites offer a delightful way to celebrate the changing seasons with a treat that is both festive and fun. With their vibrant colors and delicious flavors, these bites are sure to be a hit at any gathering. Easy to prepare and a joy to share, they perfectly encapsulate the spirit of Halloween while being a great addition to your back-to-school snacks. Enjoy the process of making these treats and the smiles they bring to those who indulge in them! Whether you’re preparing them for a Halloween party, an after-school snack, or a classroom activity, these bites are not only delicious but also a wonderful way to engage with family and friends during this festive season.